Pie Pumpkin, but no Pumpkin Pie Lovers

What to do? I picked up an adorable pie pumpkin yesterday at Wolfe Spring Farm, but no one in the household or immediate circle of friends likes pumpkin pie. And, it’s post-Halloween, so how many more pumpkins do I need to decorate the home? Options: Roast, bake, compost, allow to decompose.
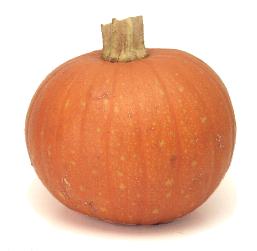
Pie Pumpkin

Pumpkin Seeds

Crispy, Spicy Pumpkin Seeds

I opted for roasting since I also wanted to use the seeds inside to make homemade spicy pumpkin seeds, an excellent side benefit of carving or cooking pumpkins. Plus, pumpkin is actually quite healthy. Pumpkin is rich in carotenoids, the compounds that give the pumpkin its bright orange color, including beta-carotene, and Vitamin A, and fiber. What’s not to like?

I had a 2 pound pumpkin, which was pretty manageable to cut open. I started by slicing it in half, and using a soup spoon to scoop out the seeds, reserving them in a separate bowl. I then put my knife to work, slicing the pumpkin into 1″ thick wedges. I mixed up some olive oil, honey and spices and tossed the slices with the mixture on a baking sheet. Popped it in the oven and let them do their thing for a good 45 minutes. And voila! Roasted pumpkin.

Honey Roasted Pumpkin Slices

1 small pie pumpkin
2 tablespoons olive oil
1 tablespoon honey
1 teaspoon ground cumin
1/2 teaspoon cardamom
1 teaspoon kosher salt
dash of cayenne pepper
dash of black pepper

photo (2)

Honey Roasted Pumpkin

Preheat oven to 425 Fahrenheit. On a sturdy cutting board, and using a large chef’s knife, slice off stem of pumpkin and cut pumpkin into 2 vertical halves. Scoop out seeds and flesh with a soup spoon. Set seeds aside in a bowl if you’d like to toast them for a bonus snack (recipe below), or discard. Cut pumpkin into slices vertically (they will look half-moons). Using a spoon or paring knife, remove any additional strings from the flesh.

In a small bowl, mix together remaining ingredients. Place pumpkin slices on a rimmed baking sheet and toss the slices in the the olive oil – honey mixture. Lay slices out on sheet in 1 layer. Sprinkle with an additional pinch of kosher salt and black pepper, and cayenne pepper (if using). Place baking sheet in oven. Roast for about 45 minutes, flipping slices 1 time half-way through the cooking time. Use a fork to see if the slices are tender. They should be lightly browned as well. Peel skin off before serving with a knife or gently remove the flesh by sliding a fork between the skin and the flesh. The pumpkin can be served warm or at room temperature, and will last 3 – 5 days in the refrigerator. Enjoy!

Crispy, Spicy Pumpkin Seeds

Raw pumpkin seeds
1 tablespoon olive oil
sprinkle of cayenne pepper
1/2 teaspoon ground cumin (or any other spices that you like
Kosher salt and black pepper

Preheat oven to 325 Fahrenheit. Assuming you are using the pumpkin seeds from your recently carved or sliced pumpkin, you’ll need to spend a few minutes cleaning up the seeds. This is arguably the most pain-staking part of the recipe. Place the pumpkin seeds in a wire mesh strainer and remove any large chunks of flesh. Then rinse the seeds under running water, making sure that you’ve removed any visible flesh and the seeds are clean. Then place seeds on a paper towel and dab them to remove excess water. They don’t have to be bone dry. I usually use 2 paper towels for this, no more.

Mix remaining ingredients. Like the recipe for roasting the pumpkin slices, place the seeds in one layer on a rimmed baking sheet (I was using my one rimmed baking sheet, so I used a pizza pan instead). Pour the olive oil mixture over the seeds and use your hands or a spoon to coat them evenly if possible. Bake for 10 minutes. Remove from oven and give pan a shake and stir around the seeds. Return to oven for another 10-15 minutes. The seeds are ready when they are lightly browned. Some may get darker, which is just fine. Taste for doneness. Allow to cool and then place in sealed container. They will last for about a week at room temperature. Enjoy your healthy, homemade snack!

Inspiration for Sunday Brunch: Spanish Tortilla and Crisp Winter Salad

Spanish Tortilla & Escarole Salad

Spanish Tortilla served with Escarole Salad

I must give credit where credit is due. This meal was largely Hubs’ inspiration. In our penultimate CSA pick-up, we had a carton of freshly dug potatoes and an overstock of bell peppers. Hubs suggested a favorite dish of ours and ran with it: the traditional Spanish Tortilla. Not to be confused with corn or flour tortillas used in Mexican cuisine, the Spanish Tortilla is an egg omelet/frittata-like dish, usually served in wedges at tapas bar all over Spain, or a staple as part of a meal. It is a hearty dish, and really makes a perfect meal on a fall morning. You can serve it warm or cold, and like most of my suggestions, makes for great leftovers.

Last Sunday morning,  as soon as breakfast was over, Hubs got straight to work on the tortilla.  It does take some prep work, but as I mentioned, it is not a one meal wonder. The beauty of preparing the tortilla in the morning is that we had our lunch ready to go and waiting for us when we came in after a brisk fall walk. All I had to do was prepare the salad. We had a large bag of curly escarole, so I made a simple balsamic vinaigrette and served it on the salad. The slightly bitter, crispy crunch of the escarole was a perfect side for the egg and potato tortilla, served room temperature. I hope this meal inspires you, too. And props to Hubs.

Tortilla Espanola
 (adapted from Mark Bittman’s Spanish Potato Omelet recipe in How to Cook Everything)
Spanish Tortilla

Spanish Tortilla

1/3 cup olive oil
1 pound yukon gold or other white potato, sliced 1/8″ thick (you can peel if you wish)
1 onion, sliced
1 red or green bell pepper, washed and sliced thinly (optional)
1-2 cloves garlic, minced
6 large eggs
1/4 cup fresh parsley, chopped
salt and pepper

Using a 10″ cast iron pan, or other oven-proof pan or skillet, heat about 1/2 the olive oil on the stove top over a medium flame. Add the potatoes slices and season with salt and pepper. Cook for about 20-25 minutes, turning the slices every few minutes. They are ready when softened and slightly browned. Remove with a slotted spoon and set aside.

Preheat the oven to 375 degrees F. Add remaining oil to pan, warm for a minute, then add the pepper and onion. Saute for about 10 minutes until the vegetables are softened. Then add the garlic and cook for another 5 minutes. Return the potatoes to the skillet and reduce heat to medium-low. Cook the potatoes, peppers and onions together, turning occasionally for another 5 minutes or so.

Beat the eggs, add salt and pepper and the parsley. Reduce the flame to low and slowly pour the eggs over the potato mixture. Shake the pan to distriubte the eggs evenly and leave undisturbed for about 5 minutes. Once oven is hot, transfer to oven and bake for ~10 minutes. The tortilla is ready when the mixture is set on top. Remove from oven and allow to cool. Flip onto serving dish, or remove carefully with spatula. Serve warm or at room temperature.

Bright, Citrus-y Pepper Pasta

Citrus-y Pepper Pasta

Citrus-y Pepper Pasta to brighten your winter night

In advance of our Oscars party, we revisited a classic recipe, adapted from The Red Cat restaurant cookbook – Spaghetti with Citrus-y Pepper Sauce.
I used

rozen bell peppers from our CSA. And as the peppers are already sliced up, we put this delicious dish together in about 25 minutes.

If you’ve got some peppers in your freezer, try this recipe. For your consideration.

Reliving the Glory of Summer – Pasta al Pesto Genovese in the Fall

Post-Thanksgiving Pasta – Sounds like a bad idea, right? I am a few weeks late with this post, but I hope you will still find it entertaining.

Pretty Purple Taters and Green Beans Ready to go

Pasta al Pesto was great excuse to reminisce about the summer’s bounty.  And required no additional shopping – a bonus after hitting the grocery store multiple times while prepping for Thanksgiving. I pulled a glass jar of pesto out of the freezer Saturday morning to defrost, excited for my resourceful quasi-pantry meal. We had purple potatoes leftover from the last CSA pick-ups (remember, potatoes do last), and the green beans, while neither local or seasonal at the moment, were leftovers from Thanksgiving dinner. We cleaned and sliced them up, and boiled the potatoes first, then the green beans, using the same water.

Boiled potatoes and green beans, awaiting their turn

Set aside the veggies, then cook the pasta in the same water. While the pasta cooked, I thinned out my frozen pesto with some additional olive oil, and added 1/2 cup of grated parmiggiano to the pesto. If you prepare pesto for the freezer, don’t add the cheese until you are ready to use it.

Add the spaghetti, steaming, straight from the pot

Add the pasta to a large bowl with the green beans, potatoes, pesto and a splash of pasta water. Toss well.

Fabulous Fall Meal: Spaghetti al Pesto Genovese

Tutti a tavola! Spaghetti al Pesto Genovese on a chilly November night. I loved dipping into my pantry to pull out previously prepared treats.

Tell me what you’ve used from  your pantry lately.

The Great Pumpkin

Great surprise at our last CSA Pick-up of the season at Wolfe Spring Farm!

And the winner of the pumpkin is…..SAM

Sam on the Great Pumpkin: half his height and double the weight

We knew that we wouldn’t have pumpkins in our pick-up this year as June had said they lost their crop earlier this summer. But not ones to disappoint, June & Jim picked up a giant one at another local farm in Sheffield. Here’s the little guy sitting atop his pumpkin (I know, gratuitous shot of Sam)

What I’ve got on tap thus far:

And a complete snapshot of today’s last pick- up:

Last 2012 Pick-up at Wolfe Spring Farm

Thank you, Jim & June for a great season! We can’t wait til next May.

À la recherche du l’ete perdu (or Better Late Than Never, right?)

OK, so Debra and Hubs were generous enough to give us yet another pickup a week and a half ago and I’m only now getting to blogging about it. Excuses abound but here it is. Y’all should be glad I’m late, actually. Since October 6, when we picked up, we’ve had a frost and fall is definitely here and summer is definitely gone. So maybe my pics will conjure some wistful thoughts……………

Look at the gorgeous haul. More soon on what we did with some of it. I don;t have pics of the great braised cabbage and kale I made. Chopped both, tossed in olive oil, added a bit of vinegar, some water though beer would have been better, a couple of juniper berries and a red chile. Braised with the top off in 400 for 20 minutes, then 250 until tender. Toss once or twice.

We were going to make something cool out of the raspberries but we and our house guests ate them up before dinner time came around!

Last of the season

Hard Frost: CSA Pick-up 10/13/12

Mid-October and the end of CSA season in Western Mass is growing nigh.

Warning: Temps dipped into the 20s last night

If you like your kale crispy, it’s your lucky day:

Frosty Kale

Despite the overnight freezing temps, we still had a wide assortment of veggies at today’s pick-up, including some new fall veggies like Brussel Sprouts (yay!), multi-colored carrots, acorn squash and leeks (double yay!):

New: Brussel Sprouts

New: Carrots & Leeks (hello again, potatoes)

I was already brainstorming on what to do with this bounty and knew I’d have to act quick. Everything looked great, but once the ice melted, I feared many things would go to mush, and worse, rot. Here’s what I’ll make once I get these puppies home:

  • Leek, Potato and Caramelized Cabbage Soup
  • Kale & Edamame Quinoa salad (inspired by Guido’s prepared foods counter)
  • Roasted Brussel Sprouts
  • Acorn Squash with Chili-lime Vinaigrette
  • TBD

Here’s the full run-down of today’s pick-up:


Next up: Community Supported Fishing?

As you know, I am a huge fan of Community Supported Agriculture  programs (CSAs), and the state of Maine.  I’ve been reading a lot about variations on the CSA theme. Yesterday, the NY Times published an article about weekly pick-up programs for fresh fish that truly help sustain fishing villages. Patricia Leigh Brown writes about Port Clyde Fresh Catch, started a few years ago by fisherman Glen Libby in Port Clyde, Maine (clearly a story after my own heart).

Port Clyde, Maine

In an effort to protect over-fished populations, many government regulations  have hurt the commercial fishing industry.  Mr. Libby came up with the idea to sell directly to consumers on a subscription basis to help pull his community together.  Mr. Libby’s idea was to turn the business on its head and sell a “mixed bag” directly to consumers, just like CSAs, instead of via wholesalers. The beauty of it is that the fisherman can catch local fish that are sustainable, not just the high-demand fish like cod, haddock, etc.  The bonus for consumers is that they’ll be introduced to new fish and seafood, much like I am confronted with never-prepared vegetables before from my CSA, AND will consume responsibly caught fish. More opportunity to experiment and learn for the home cook – all in a way that helps the local community and our maritime friends. Win-win.

Happy reading.

Critters in the Cauliflower

Check out these little fellows I found living on my organically-grown, local cauliflower from WSF

Cauliflower Critters

Hope they enjoy the compost pile! Maybe they’ll make friends.

Extreme close up

I must admit that I am quite proud of myself. I used to be MUCH more squeamish than I am now. The sight of these worms a few years ago would have sent me screaming.When I found them on Sunday, I calmly removed them from the cauliflower, slipped them into the compost bin (there were 4 in total), and wished them well. I tell you, you can’t buy that kind of excitement at the grocery store! Yay for real food and CSAs!

Have you found anything unexpected in your organic produce?

Tabbouli Tabbouli Tabbouli

I just said it 3X because it’s kind of a dirty word in our house. Some people (who will go unnamed) won’t touch it. So instead of putting it on the menu, I made a delicious quinoa recipe on Saturday with fresh tomatoes, cucumbers, and garlic from our CSA pick-up, along with parsley, chives and mint from our garden, and didn’t utter the 8 letter word. And what do you know? It was roundly enjoyed.

I’ve written about quinoa and its virtues before, so no need to blather on about that. I will say that this recipe from Bon Appetit for Tabbouli-style quinoa was easy to prepare and very enjoyable: crunchy, summery, fresh and healthy. It also lasts a day or two, tasting better on day 2 if you ask me.

Bon Appetit’s Tabbouli Quinoa. My preparation looked the exact same

I prepared the recipe with minimal modifications and it was perfect [used chopped and seeded hothouse tomatoes instead of cherry tomatoes]. Here’s how I know:

  1. Aesthetics: it looked exactly like BA’s photo above (ex the cherry tomatoes)
  2. 2nd Helpings: Served at a casual buffet lunch and discerning guests came back for more (ok, not super scientific, but unless everything else tasted awful…)
  3. The “H” Factor: Hubs liked it

Just call it something else. Chalk up another win for quinoa. I still have to try Rebecca’s recipe before the end of the month.