A Tale of Two Shrooms: Leek and Shiitake Mushroom Risotto & the Aftermath

Summary statement for this post: Make more than you need, it’s better on Day 2. I love making risotto, though it is strictly a weekend activity because it does take more than 30 minutes to prepare. But on a cool fall or winter night, it cannot be beat. I was excited to see leeks again in my last CSA pick-up, as well as 2 large shiitake mushrooms. I decided to prepare a Leek & Shiitake Mushroom Risotto dish – a twish on the traditional Mushroom Risotto. I would use leeks instead of a sauteed onion, and shiitake mushrooms in place of poricini (traditional ingredient in Italy). Sadly, mushrooms are on Hubs’s verboten food list, but I insisted on using just 1 in this recipe as mushrooms add tremendous depth and flavor AND authenticity.

Best Leftovers: Risotto Al Salto

I also used my homemade Vegetable Stock, and a rind of parmiggiano. The  Risotto was yummy on Saturday night, very earthy and even had a brownish hue. Perhaps a little too shroom-y for Hubs’s taste, which is why we had a nice helping leftover. That’s the aftermath. I usually don’t have risotto leftovers, but was actually happy to have them on Sunday because I could make Risotto Al Salto. This is a classic Northern Italian dish using leftover rice, where you basically make a crispy pancake from your risotto. This photo does not do the dish justice. Hubs declared it much improved on Day 2. Um, what’s not to like?

Day 1: Mushroom & Leek Risotto 

1 cup arborio or cannaroli rice
3 tablespoons butter
2 leeks, cleaned and thinly sliced, white and light green parts only
3 cups vegetable stock, warmed
1 – 2 shiitake mushrooms, chopped
1/2 cup shredded parmiggiano
1 parmiggiano rind (optional)
Salt and pepper to taste

Saturday Night Risotto

In a medium, heavy-bottomed sauce pan, melt the butter and saute the leeks. Saute for ~10 minutes until softened, but not yet browned. Add the mushrooms. Saute for an additional 3-4 minutes until mushrooms are softened. Add rice. Stir and let toast for 1 – 2 minutes. Add 1 ladle (about ~1/2 cup) of broth at this time. Add a dash of kosher salt. Stir and let the risotto rest. It should bubble slowly. You want to let the rice absorb the stock, and there is no need to stir it constantly. Check in 2-4 minutes if the liquid has absorbed, and if so, add another ladle of stock. Repeat until risotto has reached desired consistency. It usually takes about 20 minutes or so of “bathing,” and you may have to adjust the stove setting. You can taste for doneness by biting into one grain of rice. It should still have some bite, but be cooked all the way through.

When risotto is cooked, stir in cheese gently. You can add an additional tablespoon of butter (optional), and add salt and pepper to taste. Sprinkle with a handful of shredded parmiggiano and enjoy.

Day 2: Mushroom & Leek Risotto Al Salto, or Risotto Pancake

Leftover risotto
1 tablespoon olive oil
Handful of shredded parmiggiano

Drizzle oil in medium saucepan and heat over medium heat. Spoon risotto into pan and spread out, like a pancake. Allow risotto to crisp, cooking for about 5 minutes. Flip using a spatula and crisp on other side. Slide onto plate and sprinkle with parmiggiano. Cut into quarters and serve. Enjoy!

And, for more details on making Risotto Al Salto, you can check out Giada de Laurentiis’s recipe.

3 Reasons to Make Homemade Vegetable Stock

Why bother to make your own stock from scratch? Easier to use it from the tetra-pak, aluminum can, or make it from a bouillon cube, right? I don’t disagree, and in a pinch, I will do the same.  And not to go all Martha Stewart on you, but I will give you my Top 3 Reasons for going the extra mile for this “pantry” staple:

  1. Flavah, flavah, flavah
  2. Ready to use when you need small quantities
  3. Savings

And if I had to give you only one reason, it would really be flavor. Using homemade stock in soups, risottos, and sauces has a dramatic impact on the taste of your final product. It adds depth and savoriness, and also a LOT less sodium than any pre-packaged variety. Also, store bought vegetable stock (for vegetarians and vegans) usually leaves something to be desired when it comes to flavor.

I will admit that it does require some advance planning and some effort on your part, but you will reap the benefits next time you make a pot of soup. Like any staple, when you make a batch of homemade stock, it is to put up. The recipe below (or any variation) freezes well. Once cool, pour broth carefully into ice cube trays, freeze, then pop out and store in Ziploc freezer bags (several per bag). The recipe makes an excellent base for all your vegetarian winter meals. I used about 1/3 of last week’s batch the same evening for my Leek & Shiitake Mushroom Risotto. Stay tuned for details.

I’ll spend a moment on Reasons #2 & #3 and stick with the soup example. If you aren’t making soup every night, you probably won’t go through an entire carton of stock. So, perfect to use 2 or 3 ice cubes of homemade Vegetable Stock that will be stored away in your freezer.  Since the flavor is super-concentrated, you can use about 1/2 the quantity needed and add water to dilute. As for savings (reason #3), I can guarantee that using up the past-their-prime veggies in your fridge and cupboard will cost less than purchasing cans or cartons of ready-made stock. If you are a planner, you can save vegetable peels in your freezer to use later for stock preparation. I admit that I have never had my act together enough to do this, but have thought about it.

DIY Vegetable Broth – Basic Recipe

2 tablespoons extra virgin olive oil
2 carrots, chopped
1 onion, chopped
1 celery stalk, chopped, include some leaves
5 -10 cloves garlic, roughly chopped
5 to 10 white mushrooms, halved or sliced (Optional)
Vegetable peelings or scraps (think green tops from leeks, potato peels, carrot peels)
10 to 20 parsley stems or stems with leaves
Kosher Salt
10 Whole pepper corns

1. Put the oil in a deep skillet or broad saucepan or casserole over medium high heat. When hot, add the carrots, onion, celery, and garlic. Cook without stirring for about 5 minutes, then stir once or twice and cook until the vegetables begin to brown. (If you have more time, brown them well, stirring only infrequently.)

2. Add the parsley, mushrooms (and any other vegetables), 8 cups water, and some pepper. Bring to a boil, then adjust the heat so the mixture simmers steadily but gently. Cook for at least 30 minutes until the vegetables are very tender, up to an hour if you have time. The soup will reduce, that’s ok.

3. Strain well, pushing down on softened vegetables to release the maximum amount of liquid, before using or storing. Allow to cool completely before freezing in ice cube trays. Can store in refrigerator for up to a week.

Chime in if you’ve ever made your own homemade stock and why – vegetarian or otherwise.

The Great Pumpkin

Great surprise at our last CSA Pick-up of the season at Wolfe Spring Farm!

And the winner of the pumpkin is…..SAM

Sam on the Great Pumpkin: half his height and double the weight

We knew that we wouldn’t have pumpkins in our pick-up this year as June had said they lost their crop earlier this summer. But not ones to disappoint, June & Jim picked up a giant one at another local farm in Sheffield. Here’s the little guy sitting atop his pumpkin (I know, gratuitous shot of Sam)

What I’ve got on tap thus far:

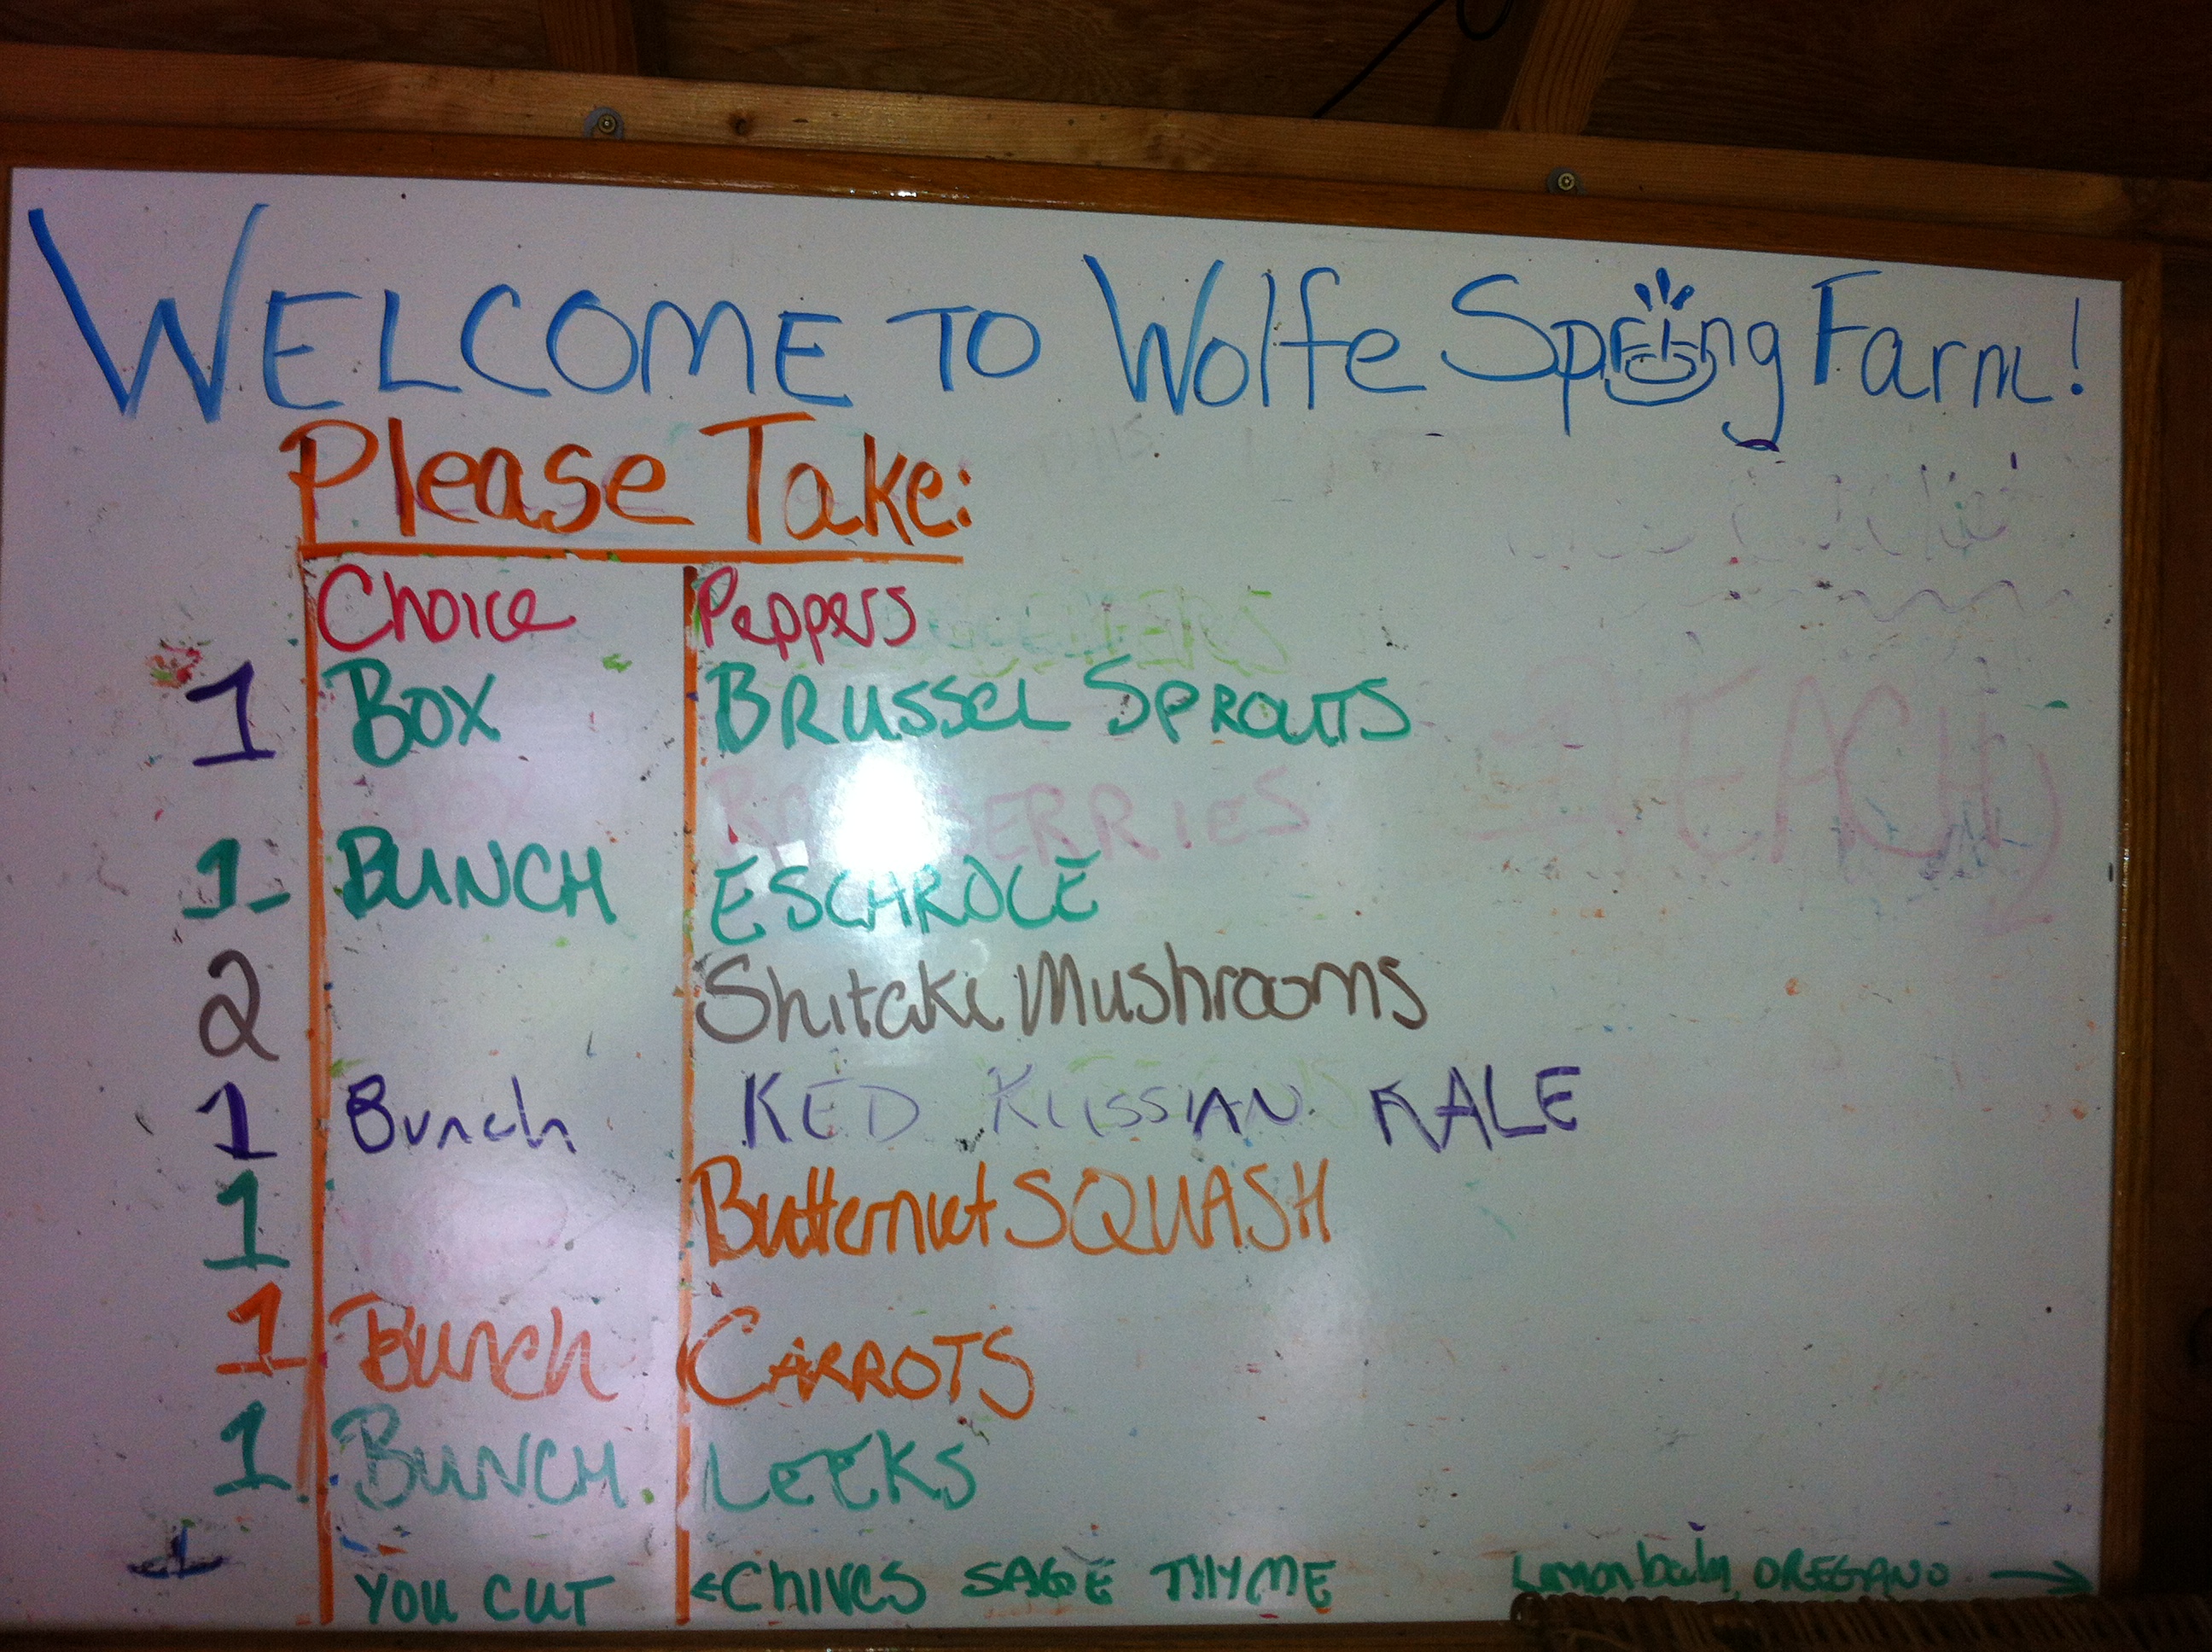
And a complete snapshot of today’s last pick- up:

Last 2012 Pick-up at Wolfe Spring Farm

Thank you, Jim & June for a great season! We can’t wait til next May.