Homemade Edamame Kale Quinoa Inspired by the Specialty Foods Counter

They say never to go grocery shopping when you’re hungry. I was so tempted to load up on prepared foods yesterday at Guido’s Marketplace in Great Barrington, but used my limited will power to stave off the urges. Guido’s Quinoa Edamame Salad (pictured below) looked divine  on an empty stomach. I liked that kale was one of the ingredients – it basically makes any recipe healthy in my book – and edamame, too (super food + protein). I nearly ordered a large container when I remembered that I had a bunch of kale in my CSA pick-up, and since it had been frosty, it needed to be prepared pronto.  Hold up, wait a minute, I was going to prepare this from scratch. I snapped a picture to capture the ingredient list (thank you, Guido’s) and hurried to the check-out counter.

Tempted: Quinoa Edamame Salad @ Guido’s Marketplace

While I unloaded the cart, I started making my mental map of prep steps.  I didn’t know the quantities, or the preparation instructions, but I was willing to wing it, even work under pressure as my belly was grumbling.  The first step would be to cook the quinoa (brilliant, I know). While the quinoa cooked, I’d prepare the vegetables and herbs (edamame, kale, parsley) and whip up the dressing. Mind you, these are all assumptions that I made.

I did a quick search online to confirm the cooking time for quinoa and found a great tip fromThe Kitchn blog. While boiling the quinoa, add a whole clove of garlic and a branch of rosemary to add an additional layer of flavor.  I loved this – the quinoa simply prepared like that tasted good enough to eat. But I powered forward, and to cut to the chase, the dish turned out great. If I had had more foresight, I’d have asked for a sample of Guido’s, so I would have had a taste benchmark as well. But, for a visual comparison, you can see my dish below. Not bad on the eyes, and pretty darn good on the palette. Recipe below photo for the adventurous.

Craving satisfied: Edamame Kale Quinoa Salad

Ingredients:

1 cup dry quinoa
2 cups water or broth
3 cloves garlic peeled, 1 smashed, the other 2 cloves minced
1 sprig of rosemary (optional)
1 tablespoon lemon juice
5 tablespoons olive oil
1 cup of edamame (if frozen, prepare according to package)
1 bunch of kale or tuscan kale, center ribs removed
1/2 cup of flat leaf parsley, washed and chopped
1-2 dried chili peppers (optional)


Instructions:

Rinse the quinoa well. Put the quinoa and water or broth in a small saucepan, add 1 clove smashed garlic and sprig of rosemary (if using), and bring to a boil. Cover and simmer for 15 minutes until all water is absorbed. Fluff with fork and let cool.

While quinoa is cooking, steam kale for 2-3 minutes. Remove from steamer with tongs and chop roughly. Place kale, chopped parsley, and edamame in mixing bowl. In a smaller bowl, prepare the dressing by combining remaining garlic, lemon juice, salt and pepper and chilis (if using). Whisk in the olive oil, and adjust seasoning as needed.

Once quinoa has cooled, add to bowl with vegetables and drizzle salad dressing over it. Stir gently to combine. Serve immediately, or store for 1-2 days.

Yield: 6-8 servings

Pesto Gone Wild

The clock is ticking for this year’s herb garden. As we approach frost-like temps in the evening, I know my basil has a limited life span. So, I did some heavy pruning on the basil this weekend and whipped up another batch of pesto to put up for the winter (remember pasta al pesto genovese?). While I was at it, I noticed that  parsley was in need of a trim, too, so did the same for my flat-leafed friend. Did you know you can make a rather tasty pesto sauce out of parsley, too? And arugula, as well, but sadly, don’t have any growing in my garden just yet. Stay tuned for updates on the cold frame…

I followed a recipe from my trusty “How to Cook Everything” by Mark Bittman. From memory, it is something like this:

Ingredients:

2 cups tightly packed, washed and dried parsley leaves
2 cloves garlic, peeled
zest and juice from 1 small lemon
1/4 cup toasted pine nuts (can also use walnuts)
3/4 cup olive oil
salt and pepper

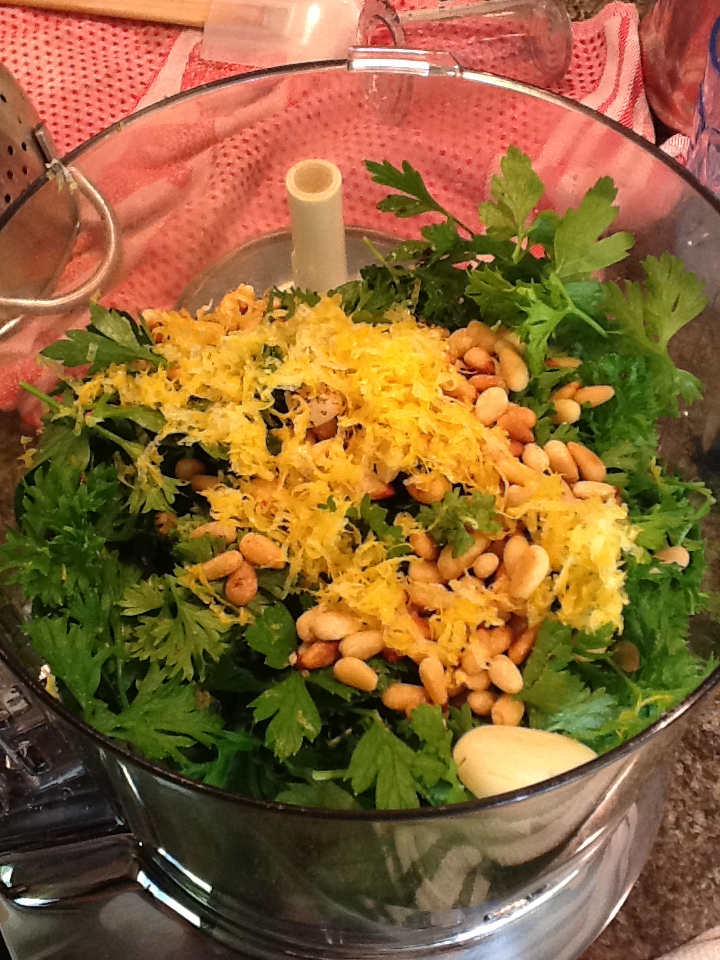
Lemon zest, parsley, garlic and toasted pine nuts ready to whirl

Instructions:

Place all ingredients in food processor or blender, but use only 1/2 of the olive oil. Pulse several times and then drizzle in remaining olive oil until desired consistency is reached. Taste for salt and pepper. Will stay in the fridge for 3 days, or pour a small layer of olive oil on top and freeze. Delicious on pasta, meats, fish, panini, etc.

I enjoyed reading RachelEats’s blog post about her parsley pesto as well. Check it out here.

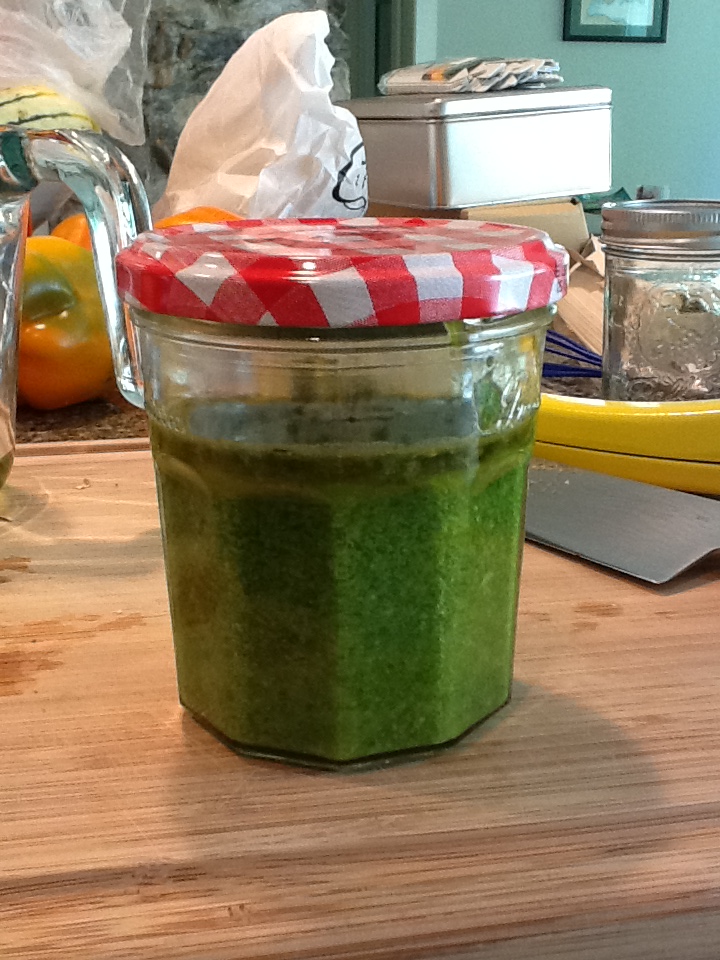
Freezer-ready pesto

It’s Thursday and I’ve finally covered off on all of last weekend’s cooking escapades.

Comfort Food, My Style: Sole Meuniere and Rice Pilaf

We’ve been back from our trip for a few days, and I am still struggling with a spot of jetlag and general post-vacation malaise. I finally had the itch to cook today, but it had to be something easy, familiar and tasty.  Nothing to boost the spirit like 2 favorite go-to dishes for dinner, and also a guarantee of a no-complaint meal. It’s my version of comfort food, so disclaimer disclaimer disclaimer that this is NOT a particularly healthy, local or nutrient-dense meal. As an aside, I picked up the handy phrase nutrient-dense from my friend Tamara John Mannelly who recently launched a beautiful new foodie blog. Check it out. But now right now as you must continue to read this…

Last night’s menu consisted of a simplified Sole Meunière and a dummied-down Rice Pilaf. And, yes, both these dishes do create a monochromatic palate often associated with fried foods, but like I said, don’t judge. It’s comfort food.

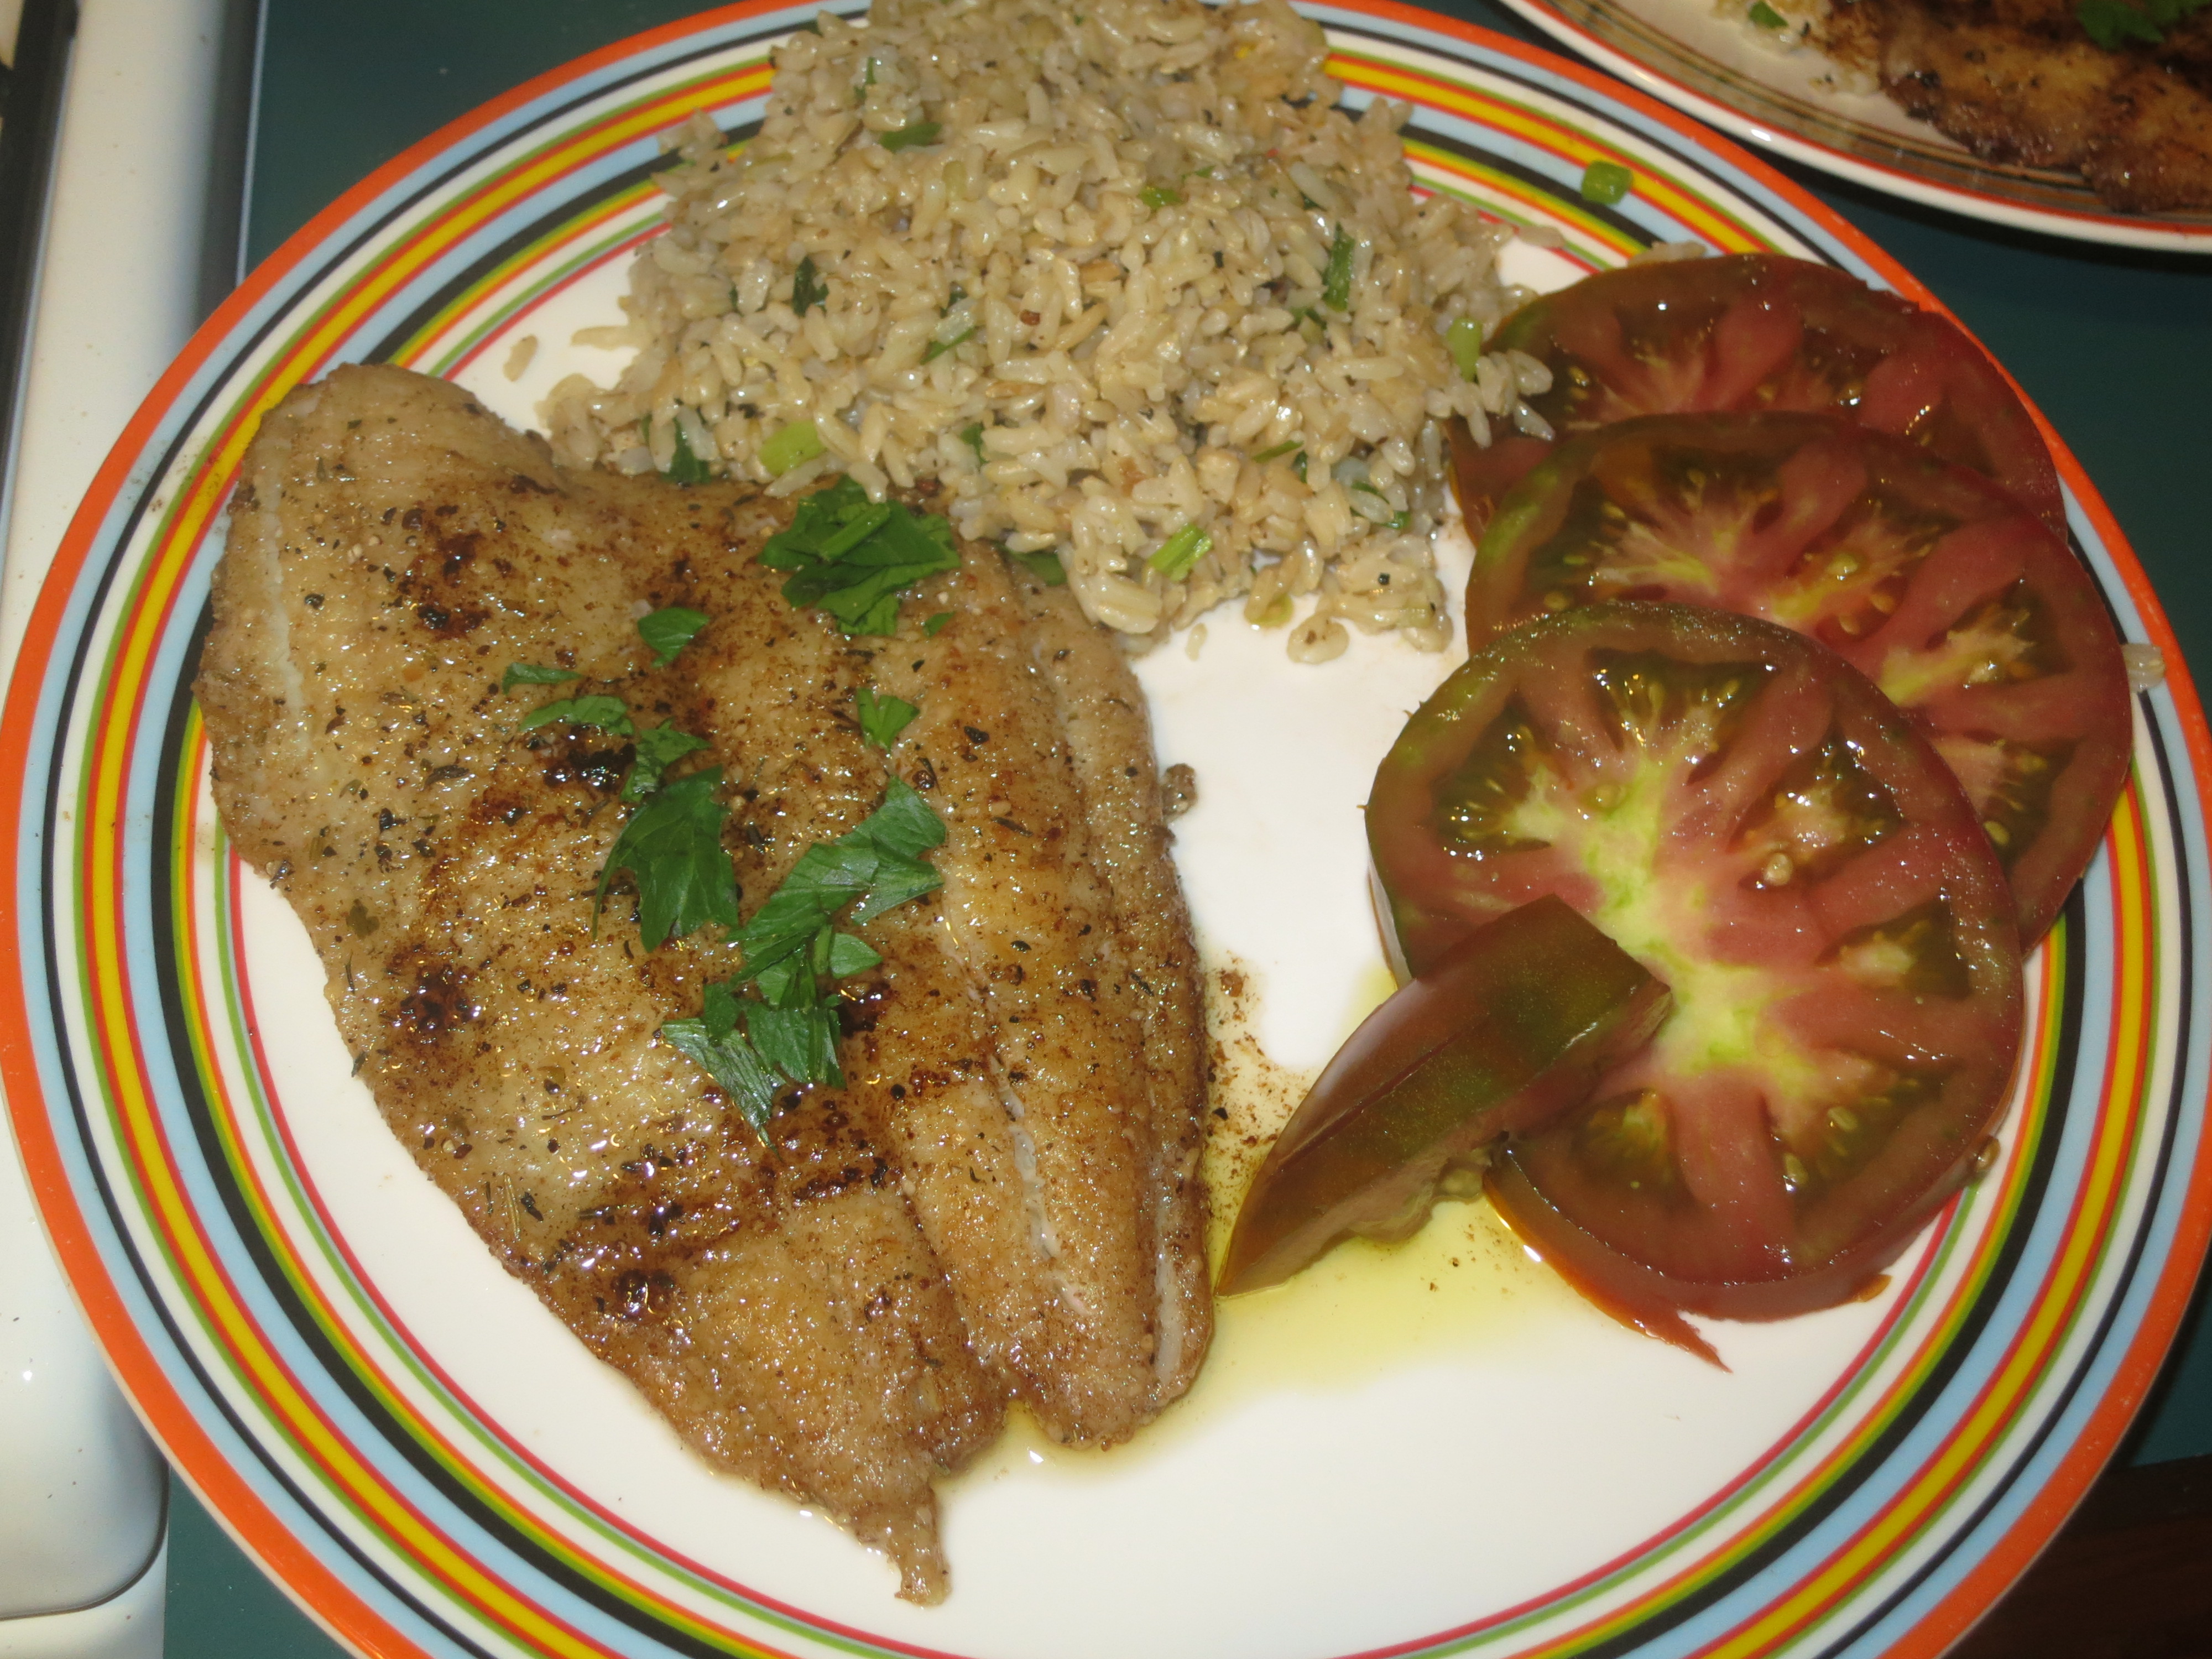
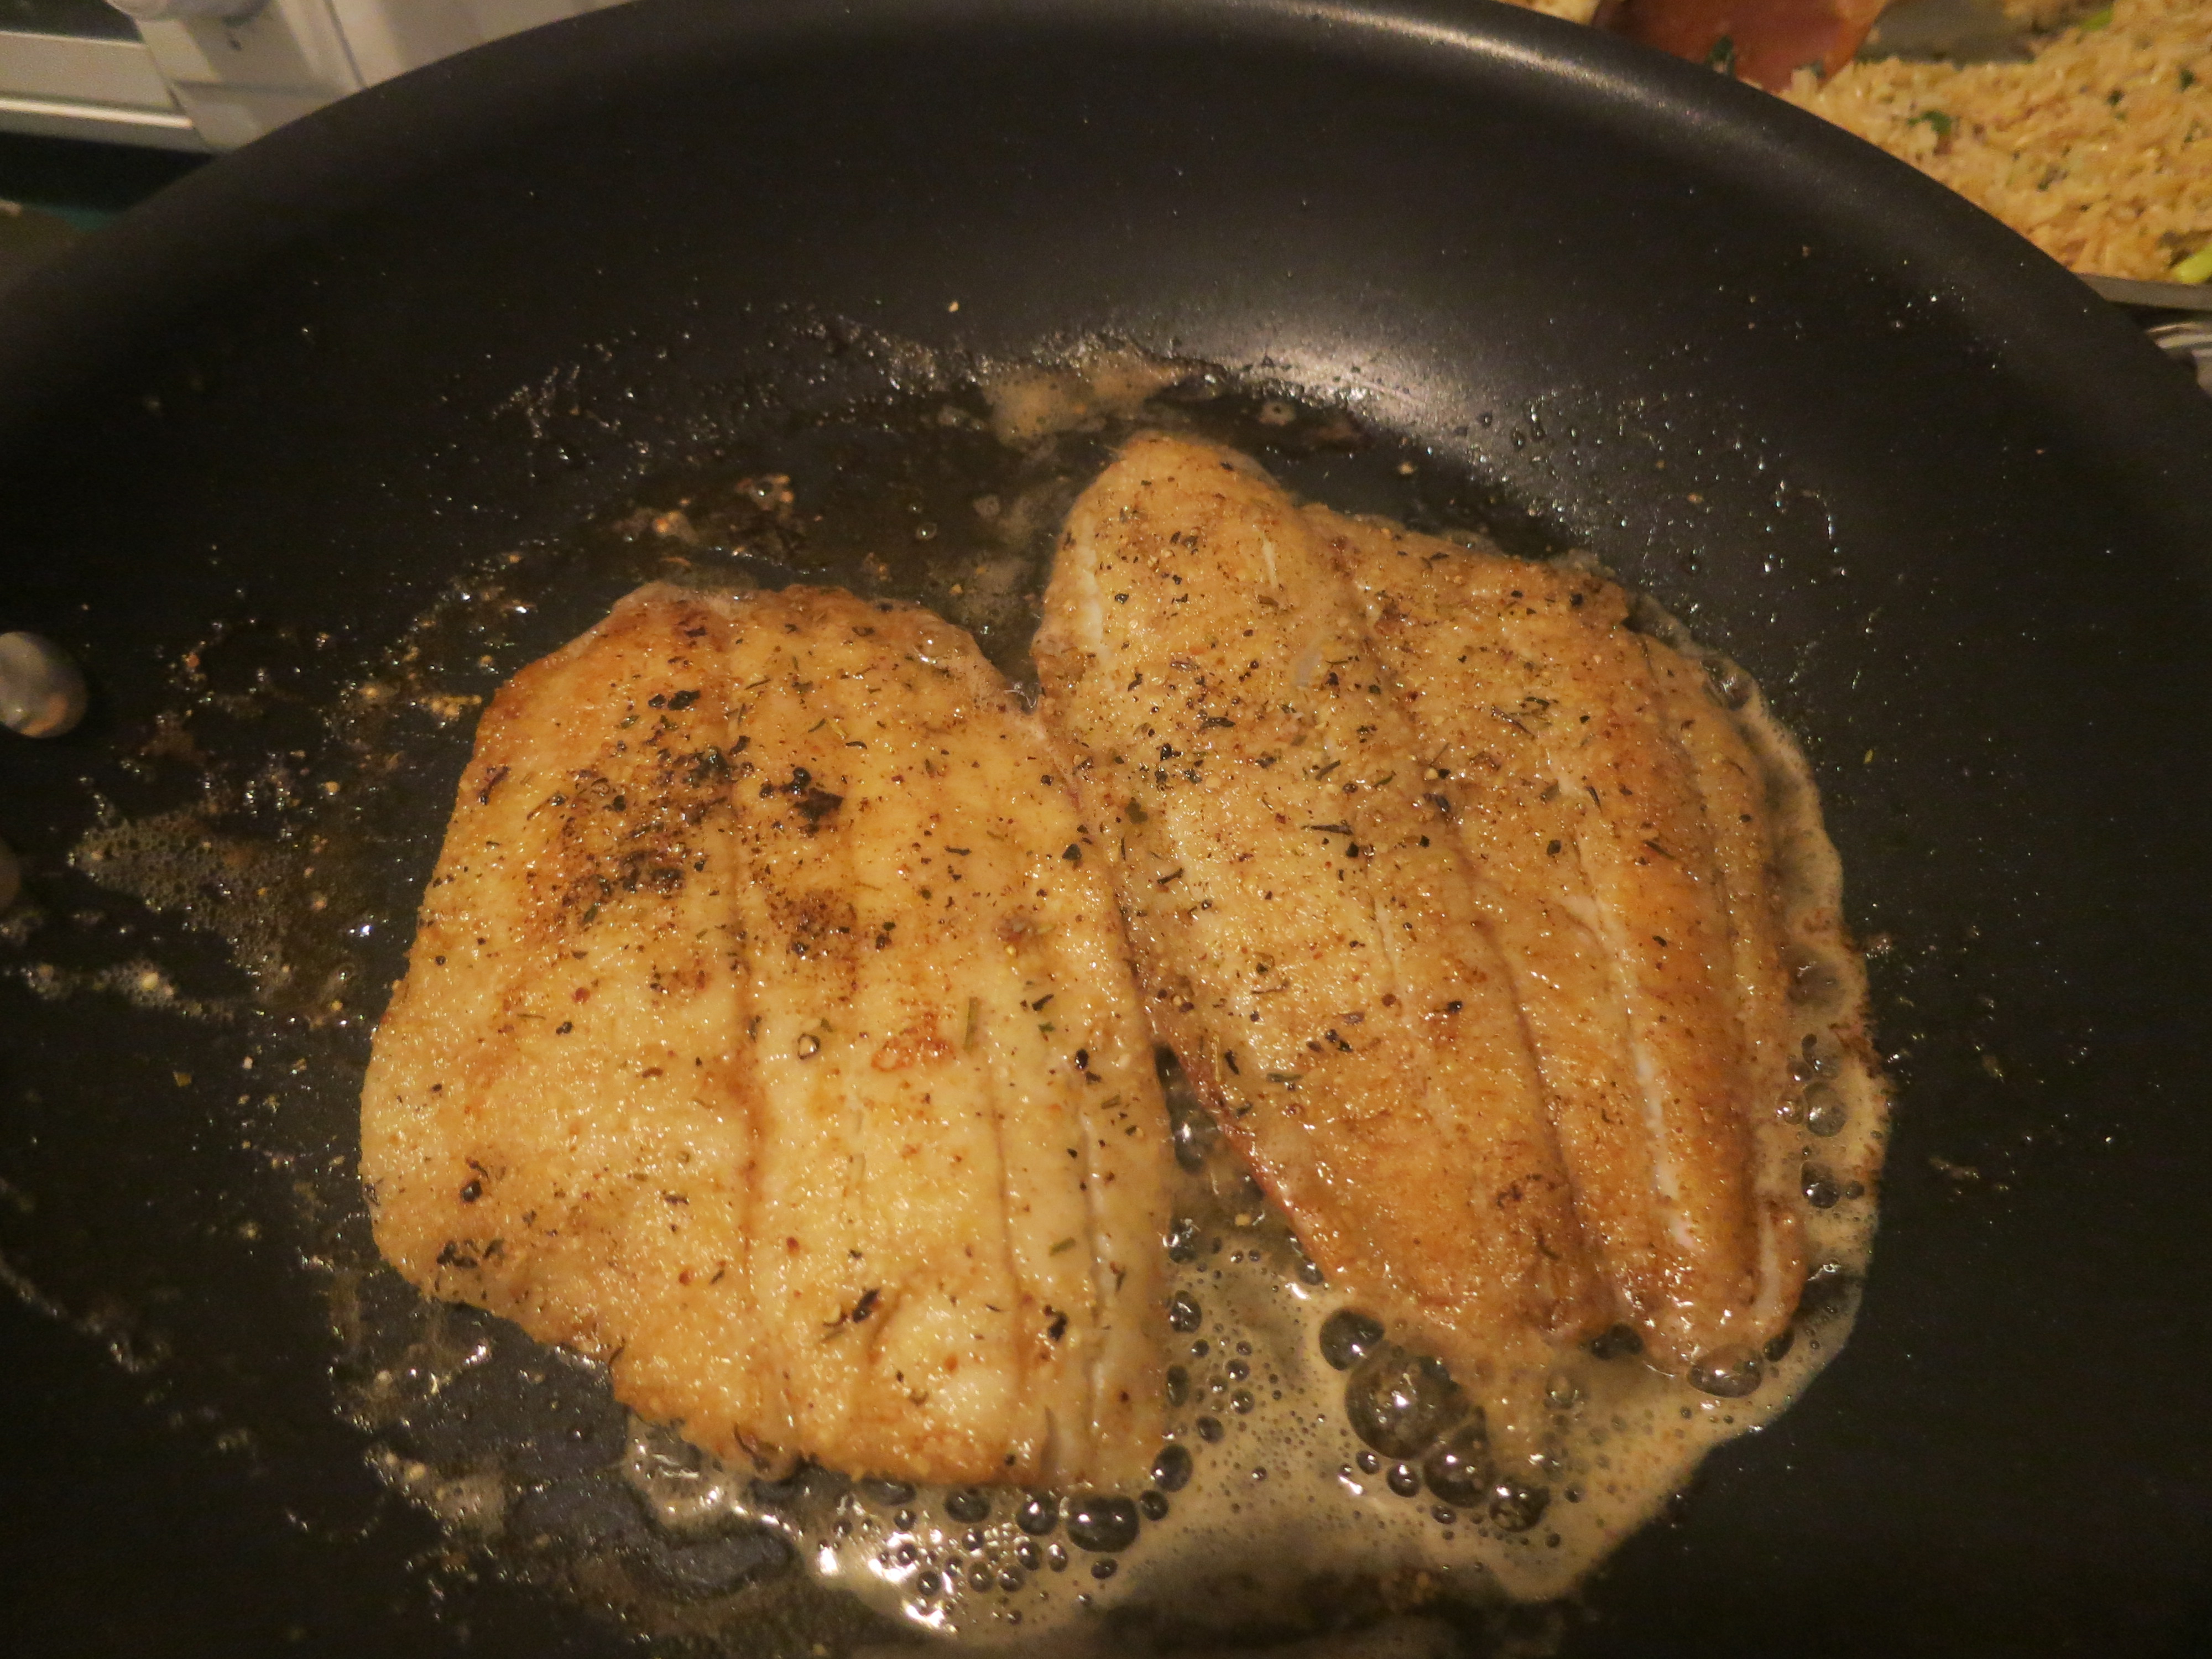
Flounder Meuniere, Rice Pilaf and Heirloom Tomato Salad

In order to spice things up the light brown palette, I sliced up an heirloom tomato (drizzled with olive oil and sea salt) and added it to our plates for color. This one plate meal was delish and hit the spots. No complaints, only clean plates  – guaranteed.

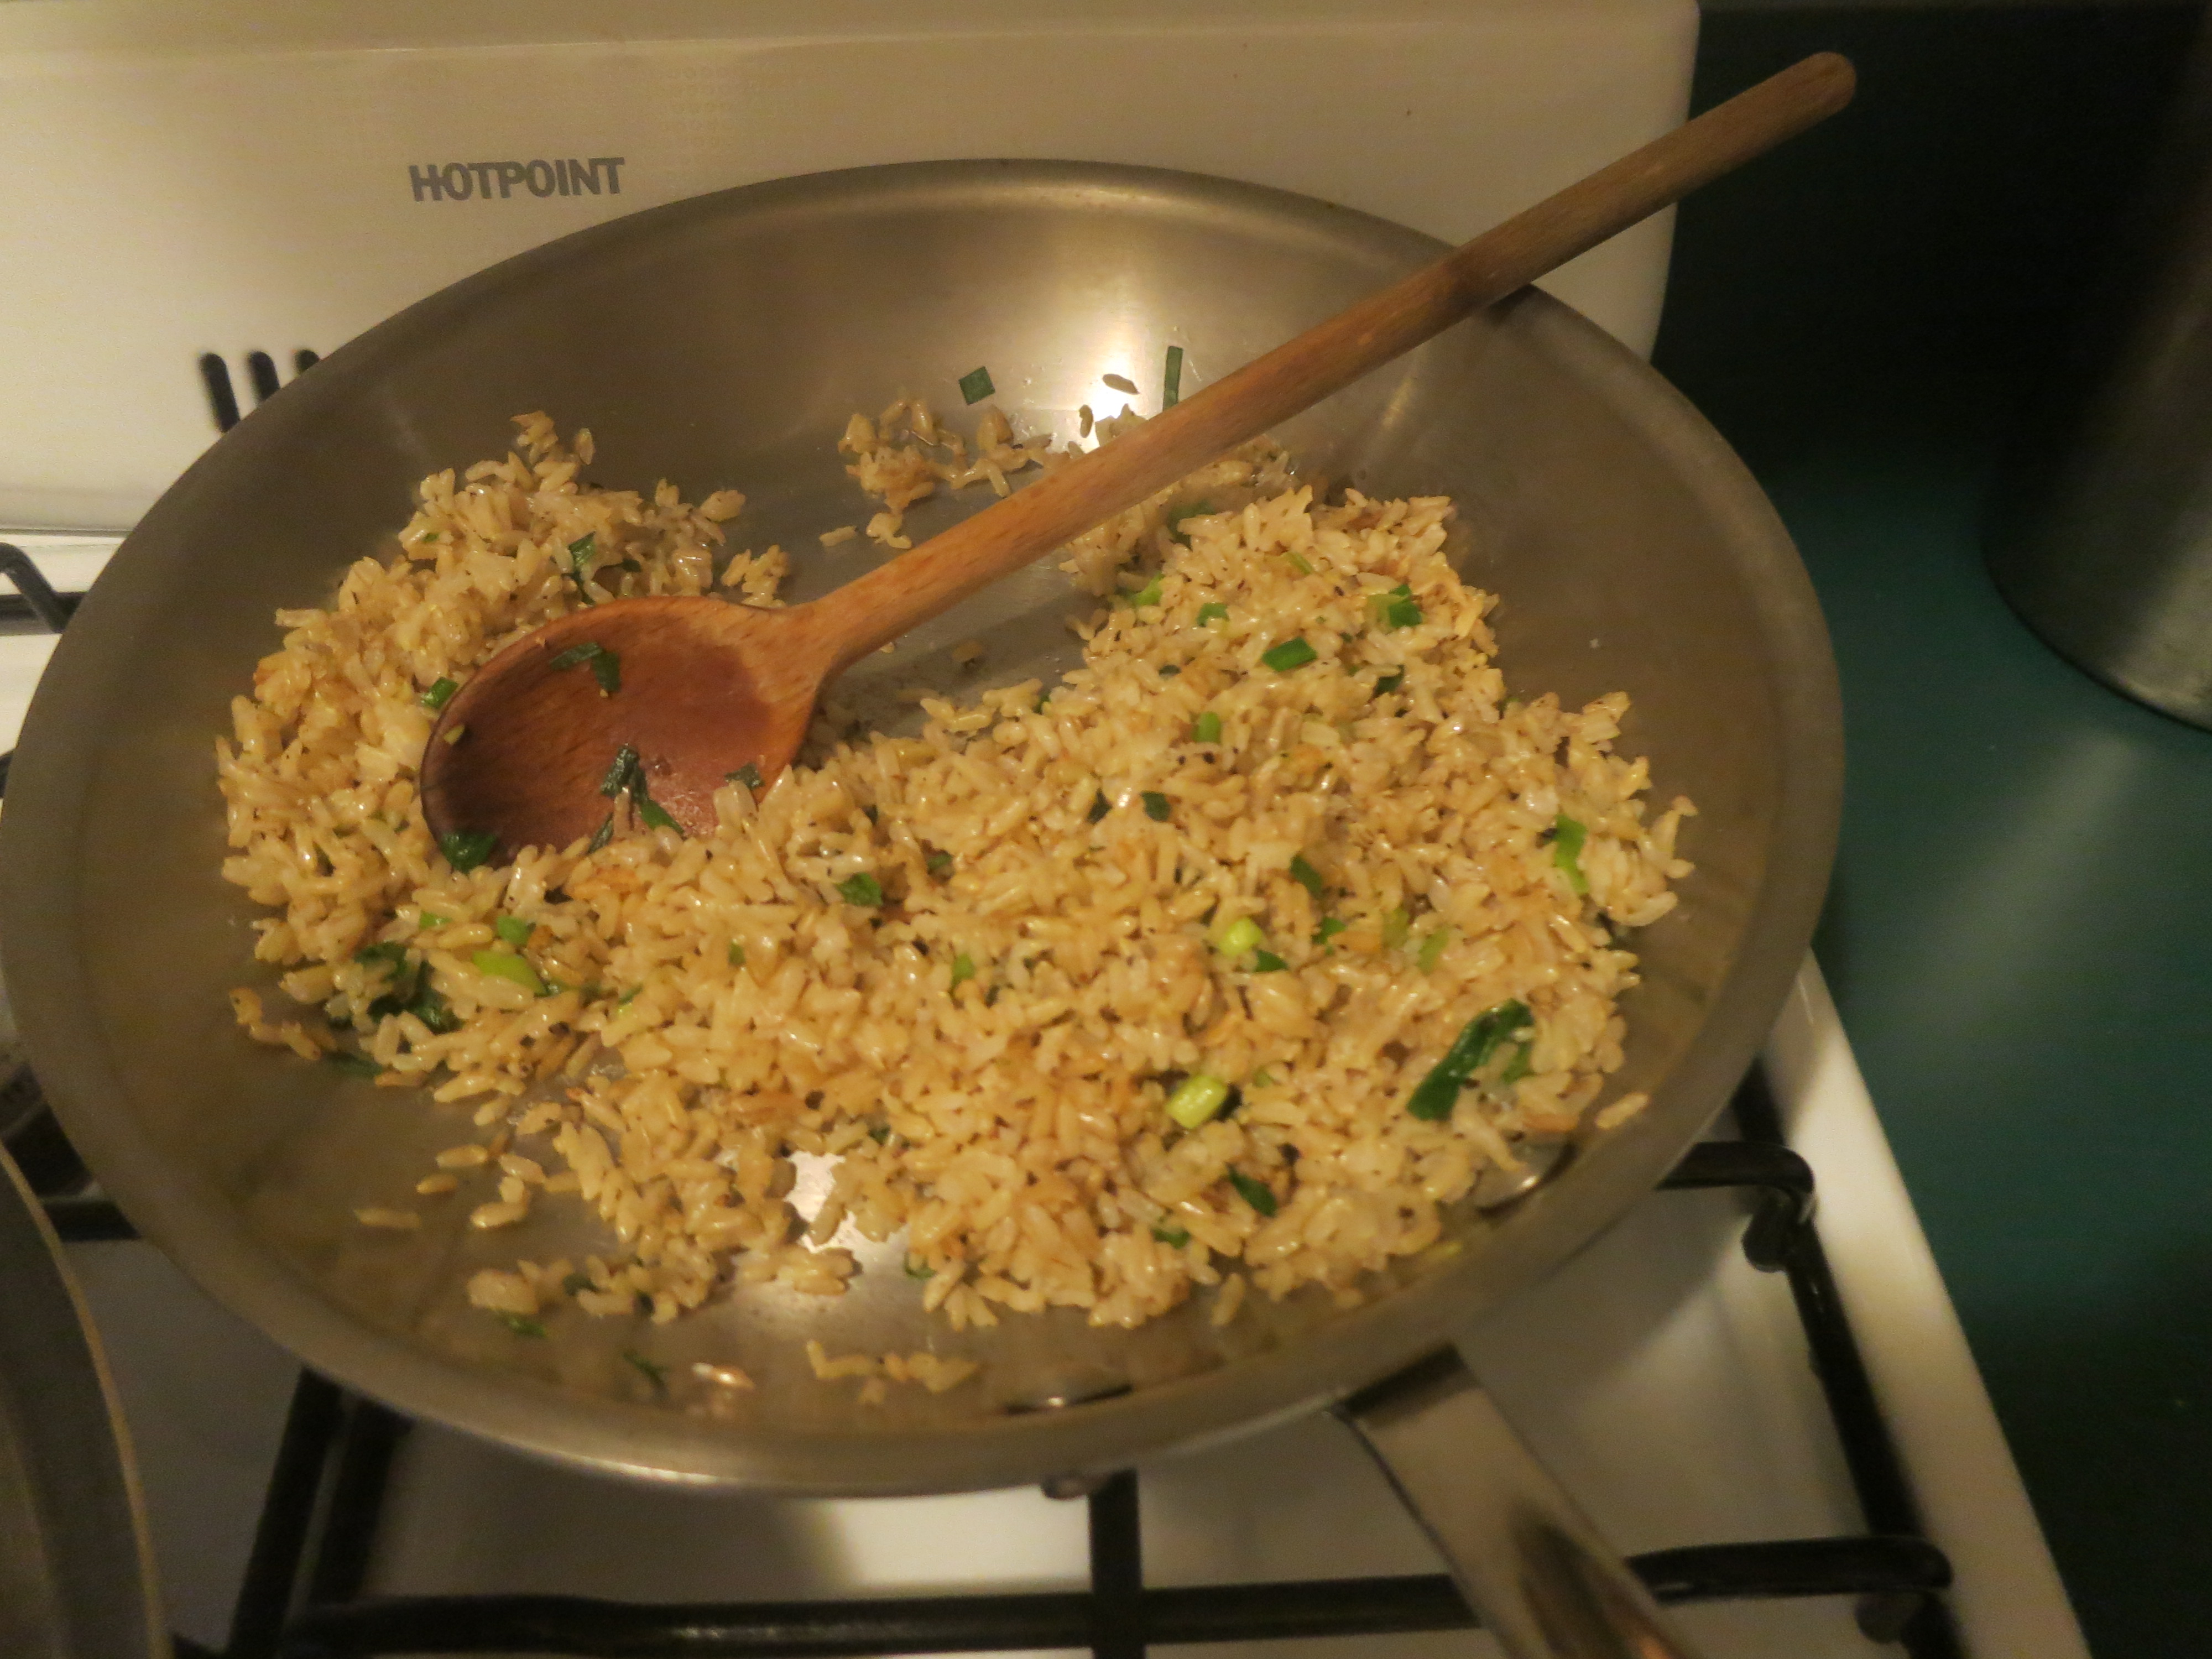
Here’s what I did: prepared a large batch of brown rice earlier in the day, in a nod to nutritious eating, though I knew I’d be doctoring it up later. In a medium sized pan, I sauteed some scallions in a generous pour of olive oil, then added the pre-cooked brown rice, along with salt and pepper and sauteed for 3 or 4 minutes on medium heat. The rice gets a little crispy, and the olive oil and scallion give it a really nice flavor. You can saute red onion, yellow onion, or shallots (or a mix) in place of the scallion. I call this dummied-down Pilaf because it is simpler than a traditional Pilaf, both in preparation, as well as complexity of taste.

Simple Pilaf in the Pan

And here’s my recipe for “Sole” Meuniere. I actually used wild flounder, not sole, because I liked the looks of it on the fishmonger’s counter. You can prepare any thin, white fish fillet in this manner. It need not be the classic French “sole” which can be pricey and hard to find.

Sole Meuniere for 2

  • 4 tablespoons butter
  • 2 tablespoons olive oil
  • 3 or 4 tablespoons of matzoh meal (or flour – I like matzoh meal because it has more texture than plain flour and my mom always uses it)
  • 1 teaspoon of savory dried herbs, like herbs de provence, or thyme, tarragon, or any other spice blend you may have on the shelf
  • 2 tablespoons freshly squeezed lemon juice
  • Salt and pepper
  • Small handful of fresh chopped flat-leaf parsley for garnish (no biggie if you don’t have any, but nice for color)
  • 2 fillets of sole (or any other fresh, thin white fish like flounder, tilapia, etc)

Instructions:

On a plate or a piece of waxed paper, mix matzoh meal or flour with dried herbs (you will dredge the fish fillets in this, so use whatever surface is easiest for you). Add healthy pinches of salt and pepper. Heat a large cast iron or non-stick pan on medium high for 1-2 minutes until very hot. Then add 2 tablespoons butter and 2 tablespoons olive oil. Once butter melts, but before it turns brown, dredge fish fillets in matzoh meal/flour mixture and place in pan.

The olive oil/butter will spatter, so watch out. Depending on thickness of fillets, cook for 2-3 minutes on each side. You want to make sure that the fillets turn a nice light brown.

Flounder fillets on side 2 – almost ready

You can test doneness by sticking a fork into the fish. They are ready when you meet no resistance. Side 2 will take less than time than side 1. Once the fillets are ready, use a spatula to remove each one and place directly on serving plates. You are now going to make a quick sauce de-glazing the pan. Very simple, not to worry

Using the same frying pan, lower the heat from Medium-high to Medium or Low-Medium depending on your stove. Add the additional 2 tablespoons of butter to the pan. It will splatter again (sorry!), but just step back and let the butter melt. Once melted, it should be safe to get closer to the stove again. Use your spatula to scrape the good bits n pieces from the pan and mix with the butter. Now add the lemon juice, let it sizzle again, mix with the spatula for 10 seconds and you’re ready to go.

Divide sauce between the two plates, pouring directly on the fillets. Sprinkle chopped parsley on top for garnish, if you have it. Serve with lemon wedges if you wish, just serve immediately.

————————-

Like I said, this meal isn’t particularly healthy since it uses a LOT of butter and olive oil, but it is tasty, easy and rewarding. What’s your fave comfort food?

Nearly Rained-Out Bruschetta Bar

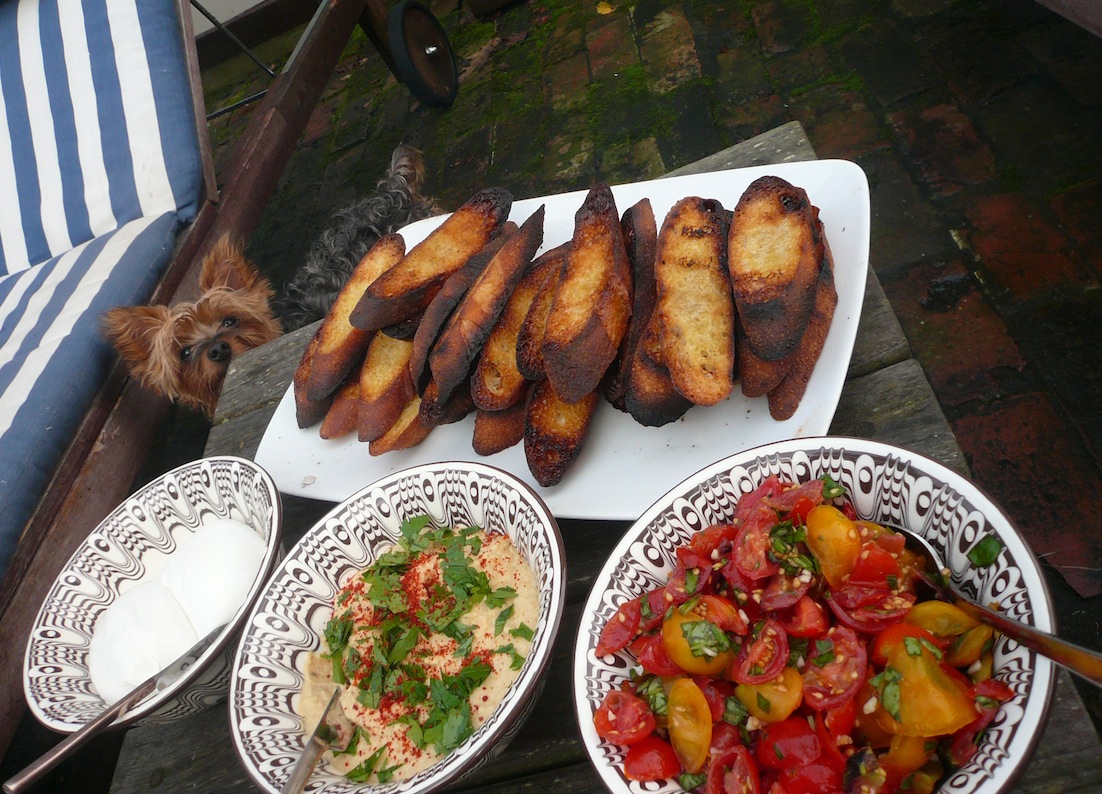
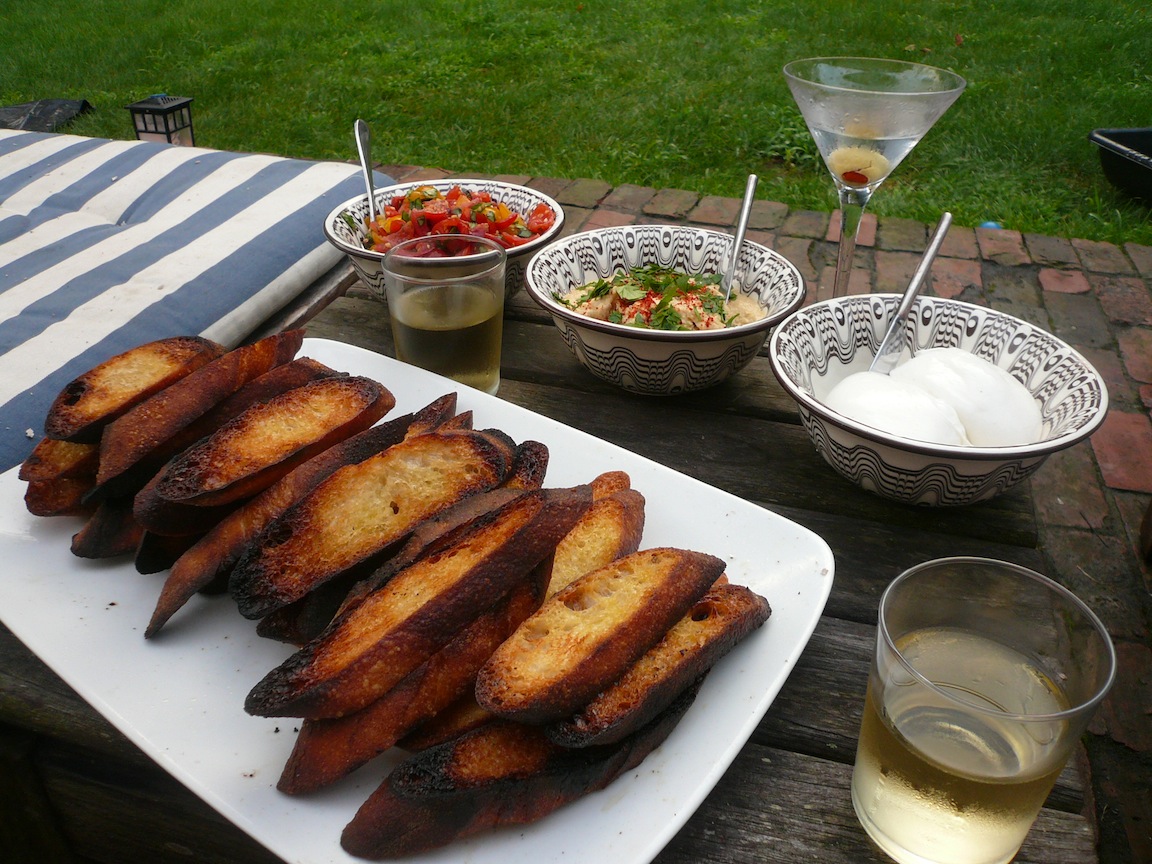
It was so hot and humid Saturday night. It drizzled and cleared up so many times we didn’t know whether to stay outside or not. Just in time for some wine and snacks, the weather stabilized. Low heavy fog, sunny up on the top of the hill, wine and bruschetta. What’s not to like?

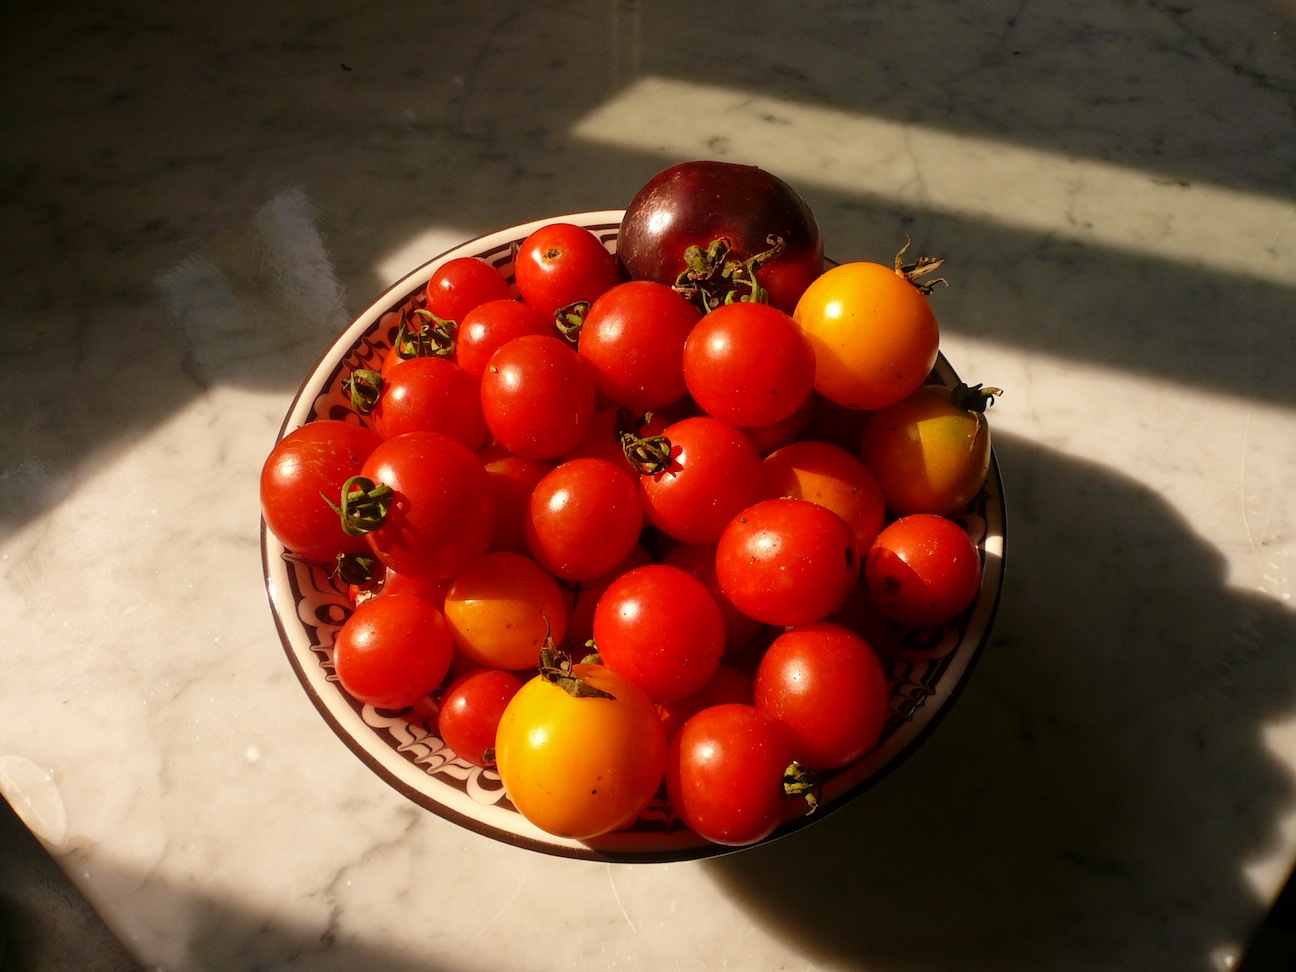
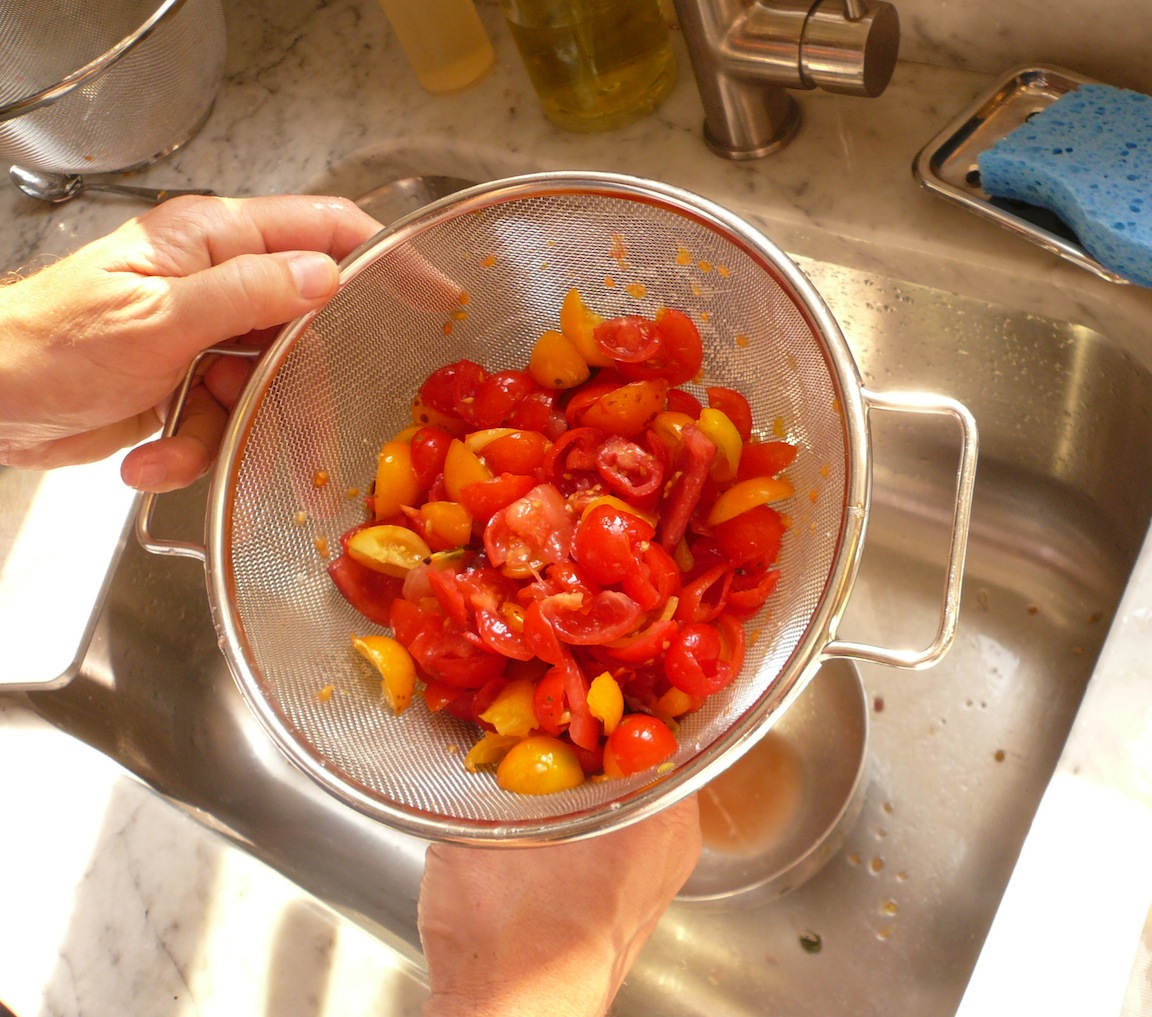
So, back to the point of all this. With the lovely cherry tomatoes from Wolfe Spring Farm we made a classic, simple bruschetta. We quartered a quart of the tomatoes, tossed them with some salt and drained out the liquid for an hour or so. Then, we tossed them with a little bit of chopped fresh garlic (one or two cloves) black pepper and a bit more salt, let them sit and drain for another half hour then tossed in some fresh chopped basil from our garden and, presto! It was summer on a piece of grilled toast (Berkshire Mountain Bakery sourdough baguette, sliced, drizzled with olive oil and grilled until crispy). We also served some buratta (courtesy of our weekend guest) and some homemade hummus (nothing local or fresh except the parsley……nobody is perfect.) this was supposed to be the first course but we were so satisfied we stopped and went straight to the banana black pepper ice cream.ImageImageImageImageImageImage

Another Great Corn Recipe: Sauteed Corn with Fresh Herbs Galore

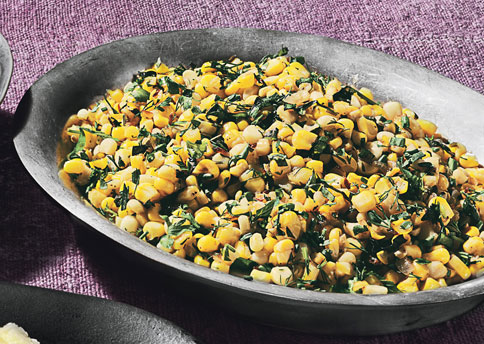
Sure everyone loves corn on the cob. But after the first few butter-slathered corn on the cobs of the season, most folks start to wonder what to do with all those ears of corn. We had a bunch from our CSA pick-up, and as June reminded me, corn does not last. Fresh corn is a limited time only treat, and we all want to make the most of it.

Hubs and I discovered an awesome recipe in Bon Appetit a few years ago that has become one of our go-to recipes for summer corn. Sauteed Corn with Tons of Herbs is simple, easy and takes advantage of other seasonal items like fresh herbs and shallots. What else are you going to do with that parsley and basil gone wild in your garden?

From Bon Appetit:Summer Corn Saute with Tons of Herbs

This is an easy recipe, but it does take some elbow grease. First, remove the corn from the cobs.

Preparation: Corn removed from cobs

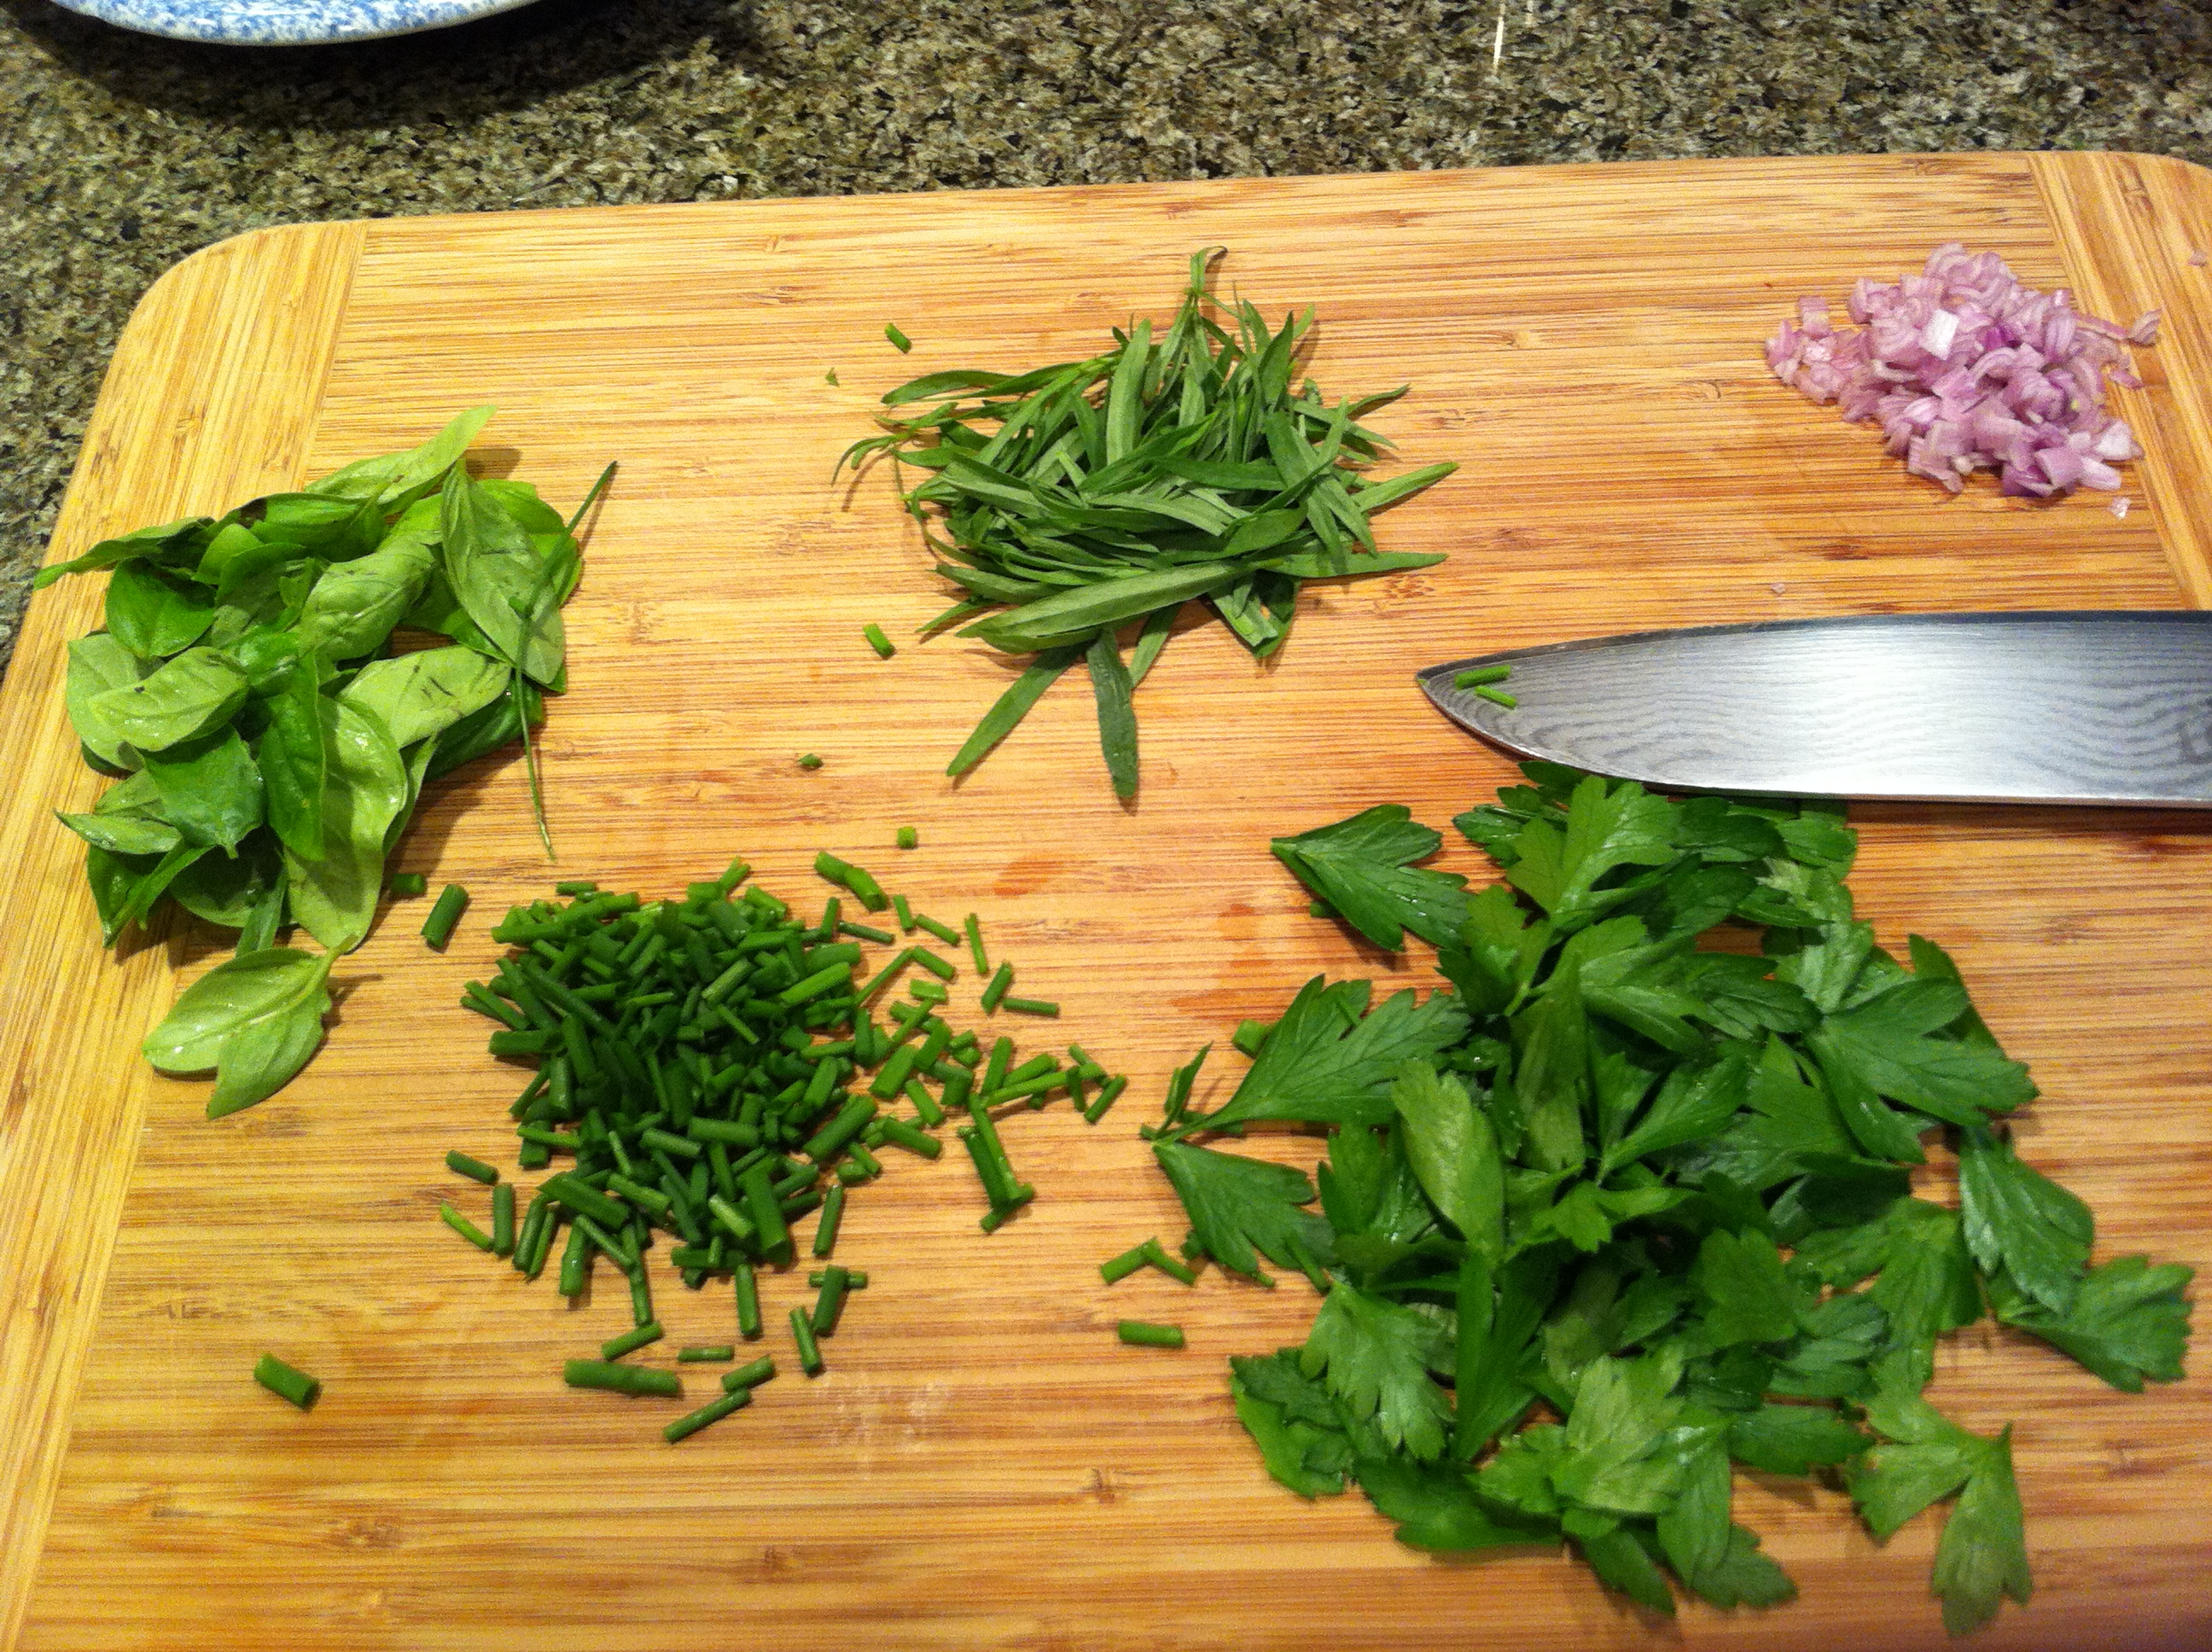
Next, chop up your herbs and shallots:

Hubs Handiwork: perfectly minced herbs and shallots

Then saute the shallots and cumin seeds in some butter, add the corn and continue to lightly saute. Remove from flame and fold in herbs. Add salt and pepper to taste and serve. Delicious warm or cold. Leftovers always welcome.

What do you do with summer corn once your love affair with corn on the cob has ended?

Grilled Trout with Tarragon

This grilled marinated trout recipe is so tasty and yummy, even carnivores find it irresistible. I found it in this handy cookbook that my in-laws Steve and Dorothy gave us a few years ago during a summer visit. It’s called the Big Book of Barbecuing and Grilling. There are some easy and worth-repeating recipe in this book by Hilaire Walden, and the spiral-bound format is also handy. The one critique I would give it is that the author feels compelled to present recipes about grilling anything and everything (as the title would suggest), but grilling is not the most convenient or suitable method for grilling anything and everything.

Big Book of Barbecuing and

GrillingTrout with Tarragon

  • 2 whole trout, about 12 oz each
  • 6 tbsp olive oil
  • 1 1/2 tbsp lemon juice
  • 2 shallots, minced
  • 1 garlic clove, minced
  • 1 tbsp fresh tarragon, chopped
  • 1 tbsp fresh flat leaf parsley, chopped
  • 1 tsp dijon mustard
  • 1 tsp soy sauce

Instructions:

  1. Make marinade by mixing all ingredients except trout together in bowl. Let sit for at least 30 min so that flavors can combine
  2. Rinse and pat dry the trout. Make 3 slashes on exterior of each side of the trout using the sharp point of a paring knife. Brush or rub the marinade liberally on the inside and outside of the trout, also into the slits. Place in a non-reactive dish, cover and allow to marinade for 1-2 hours.
  3. Prepare grill and make sure it is well oiled so fish will not stick. You can grill the trout directly on the grill, or in an oiled hinged basket [we grill directly on charcoal grill]. Wipe off excess marinade from fish and place on grill once very hot. Grill for about 6 min on each side, testing for doneness with a thin knife (should meet no resistance)
  4. Remove from grill and transfer to plates. Serve with lemon wedge and extra plate for guests to remove head and tail from fish.

We started Saturday night dinner with my Early Corn Chowder, followed by the Trout and mustard-y coleslaw on the side. The Chowder turned out great, too. And it tastes even better on day 2

Monday, Monday – What’s for Dinner?

I always feel like I have to eat virtuously early in the week as things do start to slide downhill as the weekend approaches. Tonight I’ll make another favorite, particularly in warm weather – Seared Tuna with Shallot Gremolata. This is an easy and tasty recipe from a Williams Sonoma cookbook called “Weeknight Fresh + Fast” by Kristine Kidd. This recipe will take no more than 15 minutes from start to finish, not including the time to purchase fresh tuna steaks. Props to my dear friend Lauren for giving me this book as a gift last year.

As an aside, this is a great cookbook that takes a unique approach to categorizing recipes. All recipes are bucketed by season and feature seasonal ingredients.This recipe is ironically in the “Winter” section, but seasonality is linked to location, right?  It’s the citrus used in the recipe that places it in the “Winter” section, but since lemons and oranges never grow in NY without extraordinary efforts, I have no qualms about making this in July. Plus, I’ll use a few ingredients from my CSA pick up and garden.

Tuna with Shallot Gremolata recipe adapted  by me from Weeknight Fresh + Fast. Serves 2

  • 2 tuna steaks, about 6 ounces each (sushi grade tuna preferred)
  • 1 teaspoon mustard seeds
  • 1 teaspoon ground fennel seeds (use a mortar and pestle)
  • 1 lemon
  • few tablespoons chopped flat leaf parsley (from my herb garden)
  • 1 small minced shallot (from CSA Pick-up)
  • 2 teaspoons olive oil

Instructions: Mix together mustard seeds and fennel seeds and press into both sides of tuna steaks. Sprinkle with salt and pepper

Prepare gremolata: zest lemon in a bowl and add chopped parsley and shallot. Add a drizzle of olive oil to moisten the mixture. Gremolata done.

Prepare tuna steaks: Lightly coat a nonstick pan or cast iron pan with olive oil and heat over medium  to medium-high heat. Once hot, add the tuna steaks and cook 2-3 min per side depending on thickness of steak. I like to leave it very rare, or pink, in the middle. Sprinkle with gremolata and serve immediately

—–

You will have gremolata left over. Consider this a bonus – save it in the fridge and use it on other grilled dishes. It will stay for a few days.

On the side: You can serve this with any starch, or a light salad of fennel, red onion slices and orange slices. I love the fennel salad, but hubs never touches it, so I’m not bothering tonight.

We will have steamed haricot verts with a mustard vinaigrette and grilled bread rubbed with garlic and a hint of tomato (pan con tomate for you Spanish foodies)